We’re currently right in the middle of winter. It’s cold, raining, and in many parts of the country, there is a good layer of snow. This all means that any DIY jobs outside will have to be put off until later in the year when the weather is a lot warmer. Of course, that doesn’t mean you can’t do any DIY jobs at all. After all, you still have the inside of your home and, let’s be honest, we always have a list of DIY jobs to do inside the home! They could be small jobs such as painting a ceiling in your bathroom that has discoloured over time or something much bigger, like painting your kitchen cabinet doors!
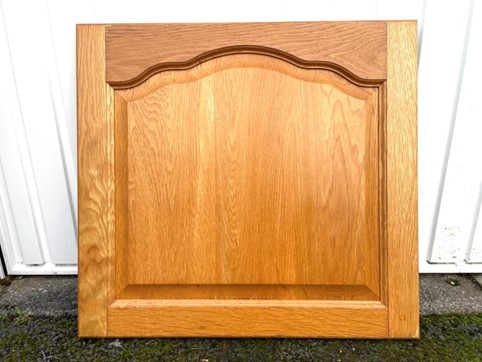
The kitchen
.. is usually one of the most used rooms in people’s homes. As a result, everything over time can start to look very tired and it is the kitchen cabinet doors, which bear the brunt of all this wear and tear. They are constantly opening and shutting, as well as being affected by the moisture, heat and fumes from cooking. This can lead your cabinet doors to have a sticky texture. People often choose to replace the cupboards completely or just the doors, but that can be pretty expensive.
Today I am sharing this tutorial to show you how to update your kitchen to give it a fresh, modern and clean look, at a fraction of the cost of replacing the kitchen doors or cupboards.
I will be showing you how to paint kitchen doors using Rust-Oleum Kitchen Door Paint so they will look like they have just come out of a showroom! The other major advantage of painting your kitchen doors is that you will be up upcycling which is great for the environment.
Rust-Oleum Kitchen Door Paint is definitely my go-to paint for this type of DIY project. It requires no primer and normally two coats will cover any previous finish on the doors, which in turn will give your kitchen a lift and a very modern look.
I chose to buy my Rust-Oleum paint in metal paint cans because I find it an easy container to transport, it keeps the paint in good condition (helping it last for another project) and because, when I have finished using it, it can be easily recycled. You just need to make sure you clean out the paint can before you put it in your recycling. You can do this with old newspaper or cloth, then simply rinse with water.
This tutorial will show you step by step how to paint kitchen cabinet doors to achieve the perfect finish.
So, let’s get on with the step-by-step tutorial.
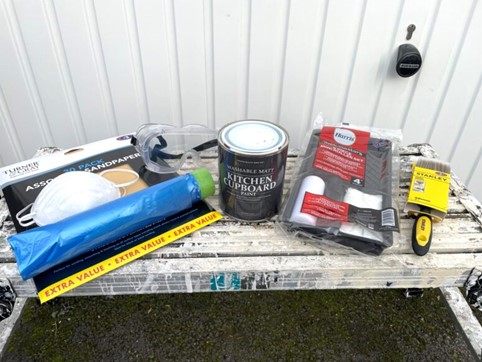
Tools and products required:
1. 750ml tin of winter grey Rust-Oleum Kitchen Cupboard paint
2. A selection of different grade sandpapers (inc. 120)
3. Two-inch paintbrush
4. Mini roller set with an emulsion roller head
5. Sugar soap
6. Dust sheets
7. Clean cloth
8. Safety goggles and face mask
Before I start the tutorial, I have one tip which will help you to achieve the perfect finish on your kitchen doors.
Tip 1 –
I cannot emphasise how important preparation is for any DIY job. Doing the correct preparation will give you the perfect finish and you can then look back with pride at what a fantastic job you have done.
Step 1 – Doors Off
The first step to getting the perfect finish on your doors is that you will need to remove the doors and place them on a flat service. Removing the doors is very easy. It is just a couple of screws, and they will come off easily. At this point also remove any handles and hinges.
By painting on a flat surface, you eliminate any chance of runs in the paint which you would then need to sand down, forcing you to effectively start again. By removing the doors, you will get the perfect finish first time.
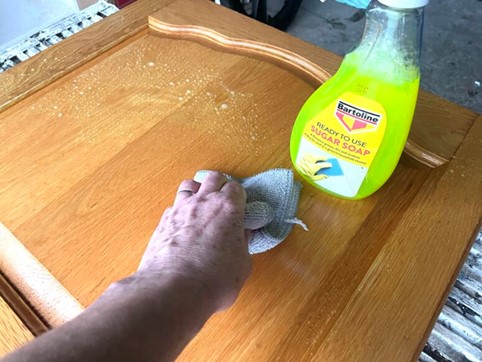
Step 2 – Clean
Over a period of time, kitchens build up layers of grease and scum caused by cooking. Paint reacts very badly to grease, meaning it won’t adhere properly. To remove the grease and scum build up, I always use sugar soap with a lint free cloth and give the door a good clean.
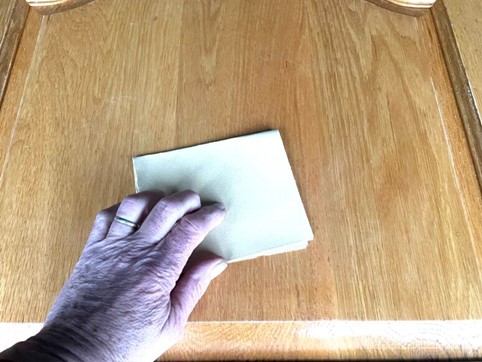
Step 3 – Sanding
Once the doors have completely dried, use a grade 120 fine sandpaper to sand them. You will need to do both sides. This will give the surface of the kitchen doors a good finish for when you apply the paint allowing it to adhere properly. Once you have finished sanding, use a damp cloth to remove any dust or particles.
Tip 2
When sanding, always wear a face mask and goggles to stop you breathing in particles and prevent particles from going in your eyes.
Step 4 – Painting
You are now ready to start painting your kitchen doors. Before we start painting I have just one tip…
Tip 3
Do not, under any circumstances, try to paint the door in one coat. The coverage will be very uneven because you will try to compensate for areas that are not covered with too much paint.
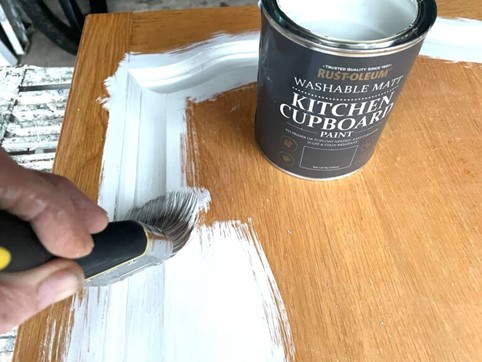
Now that we are ready to paint, it’s time to grab your half-inch paintbrush and your mini roller kit.

Start by painting the moulded finish (if you have them) with your paint brush, making sure you get right into all the corners. Make sure you don’t overload the brush with paint and paint in one direction with even paint strokes.
You are now left with the flat surface which is where the mini roller comes into play. Pour some paint into the paint tray. Make sure you apply paint to all of the roller head. Then, again using even strokes, roller in the same direction as before, covering the front of your kitchen cabinet door.
To finish the front of the door, paint all the edges with your brush or roller.
This will now need to dry, which, according to the manufacturer’s instructions, takes two hours. Personally, I would wait four hours before applying the second coat.
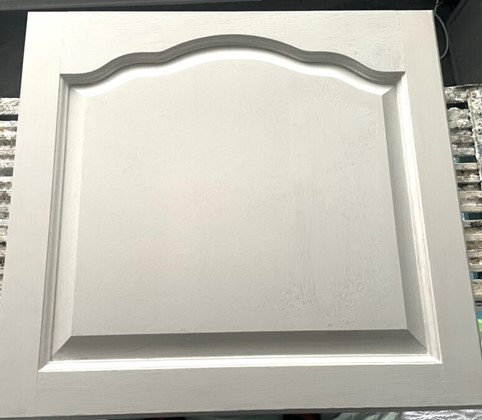
If your first coat has been done correctly, then the previous finish on the door will still be visible. As you can see on the image above.
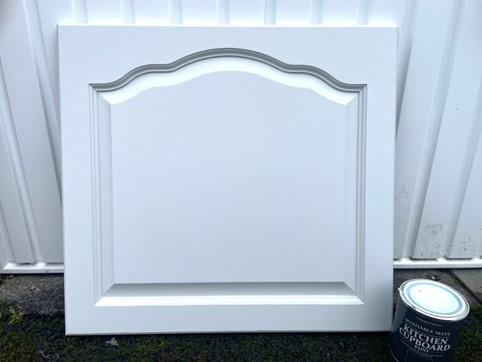
Now it’s time to apply the second coat and you do this exactly as the first coat. Depending on the previous finish, you may need to give it a third coat of paint. Make that decision after the second coat has dried.
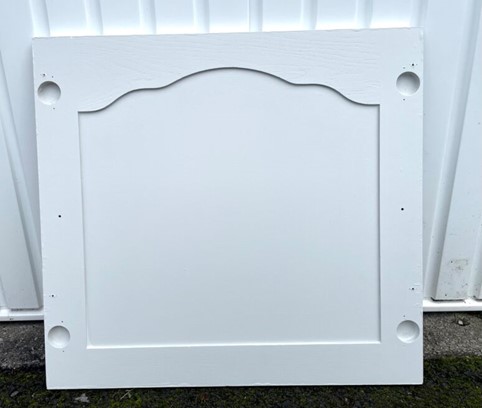
Painting the inside of the door is quite easy because it will be flat.
Tip 4
Before you start painting the inside of the doors, lay a towel or cloth down on the workbench to stop you scratching the front of the door. Then using the mini roller apply the paint in the same way as painting the front of the doors.
You should now have perfectly painted kitchen doors that will give your kitchen a whole new modern look.
The time to complete this DIY job is approximately 4-5 hours, depending on the number of kitchen doors being painted.
That is my tutorial on how to paint kitchen doors.
Blog by Nigel Higgins – DIY Daddy
Check out how to Paint UPVC with Bedec Multi Purpose Paint.


