Over the last twenty years that I have been a painter and decorator there has been one question that is without a doubt the most popular question. Can you paint any type of surface such as wood, glass, wall tiles or UPVC? The simple answer is yes!
Nowadays you can buy paint for any surface and not only do they work, they will also give a brilliant finish to any surface.
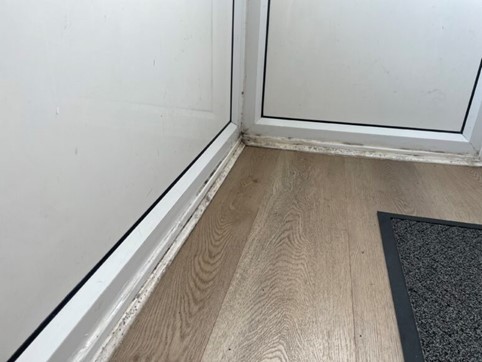
In this tutorial I will be painting UPVC. We have a porch at the front of our home which is constructed using UPVC. Most of the UPVC is perfectly fine and still in very good condition. Unfortunately at the base of the porch inside it has gone black due to mould and scuff marks made by shoes. You can of course try cleaning this with a UPVC cleaner but in my experience it never really brings it back to looking white and clean looking.
So I’m going to show you how to paint the affected area using Bedec Multi Purpose Paint which will make the UPVC look like new again.
Before we start the tutorial it’s very important that when buying your Bedec Multi Purpose Paint that it is in metal packaging. This is the most environmentally friendly and sustainable way to buy. It’s also much better for storage.
The reasons behind this are quite simple. Metal recycles forever and it’s a permanently available material. It also has a high recycling rate and can of course be upcycled and reused in many different and creative ways. Check out some of the other blogs to see some DIY tutorials on how to reuse cans.
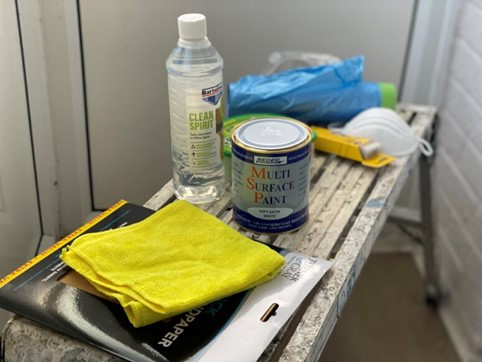
Tools and Products Required
1. 1 750ml tin of Bedec Multi Purpose Paint
2. 1 bottle of white spirt or similar
3. Cleaning cloth
4. 120 grade fine sandpaper
5. 1.5-inch (38.1mm) paintbrush
6. Masking tape
7. Dust sheet
8. Goggles
9. Face mask
Now we are ready to start our tutorial.
Tip 1
It’s important that the area is well ventilated because of the types of products you will be using, namely the white spirit and always wear goggles and a face mask.
Step 1
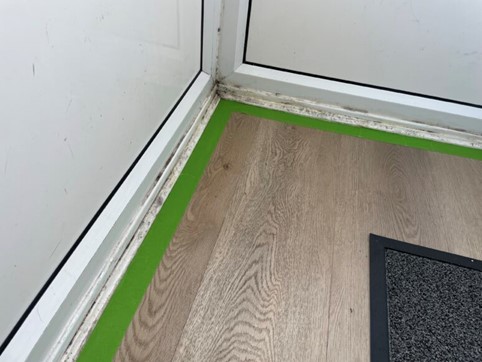
Mask off the area to be prepared using Frog Tape masking tape. The reason I use this particular masking tape is because it gives a very clean straight edge when painting and use dust sheets to protect the flooring.
Step 2
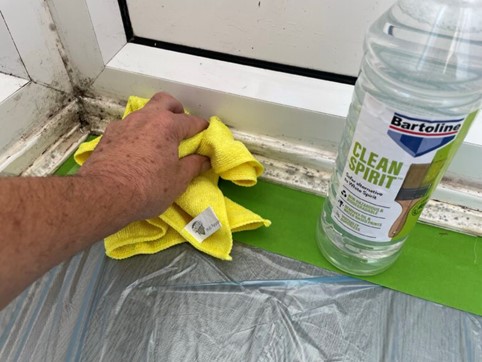
Using a clean cloth and the white spirit, wipe down the area that is going to be painted.
Tip 2
Before moving to next step make sure the entire area is dry.
Step 3
It’s important that the paint sticks to the UPVC that you are painting… So, using the fine grade 120 sandpaper, very lightly sand the area. Once done, wipe down again with the white spirit.
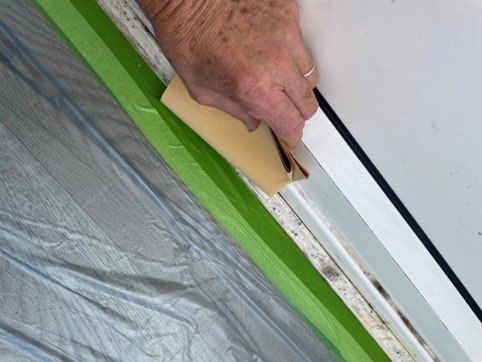
Step 4
You are now ready to paint. Make sure you stir your paint so it’s properly mixed. Bedec Multi purpose paint doesn’t require primer or undercoat so you can use it straight from the tin.
Using your 1.5 inch paintbrush use even strokes to apply the paint. I’m using a Bedec multi purpose paint in soft satin as it’s the closest finish to UPVC.
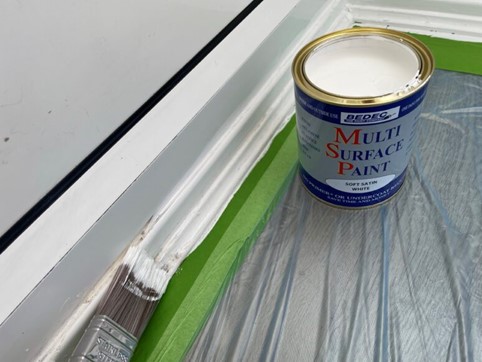
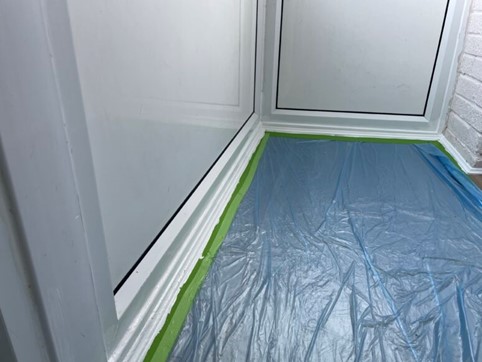
This is after one coat
This will need 2 coats of paint so allow at least 2 hours before applying the second coat. Bedec multi purpose paint is water based so it will dry quite quickly but the longer you leave to dry the better the final finish will be.
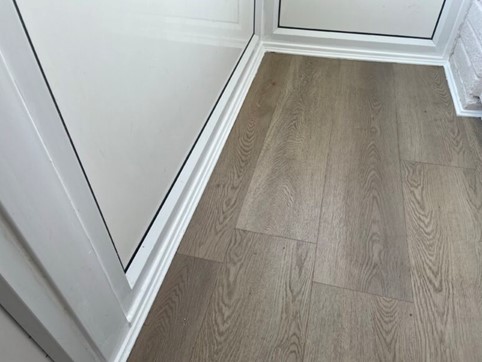
After second coat
Once you have applied your 2nd coat of paint that is the job done and it should be a brilliant smooth white finish.
That’s my tutorial for painting UPVC and as I said any surface can be painted as long as the preparation is correct and you purchase the right paint.
Blog by Nigel Higgins – DIY Daddy
