We recently had our bathroom renovated, which was a major renovation. Everything had to be completely ripped out so we could start all over again. In the process of removing all the major furniture, we did some damage to our doorframe, so this is my guide to show you how to repair and repaint damaged wood.
Renovating our bathroom was always going to be a difficult job as the original bathroom was fitted in the 1960s when the property was constructed.
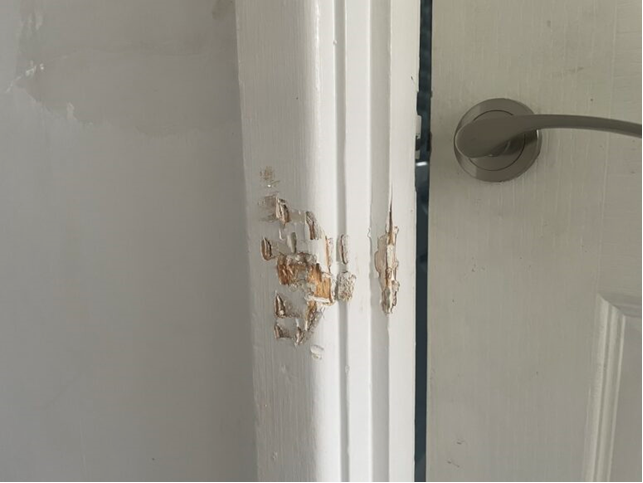
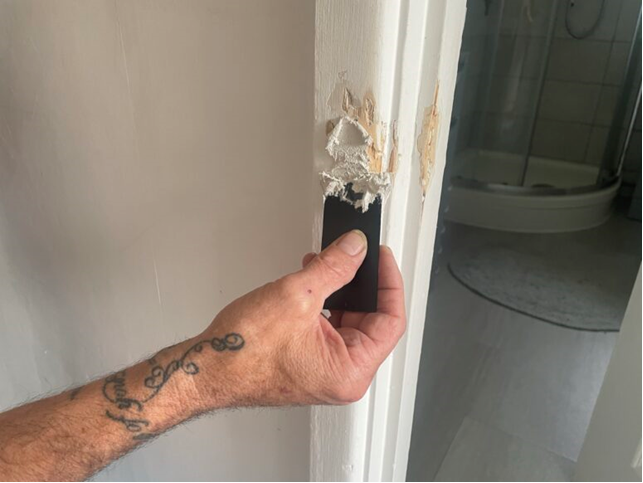
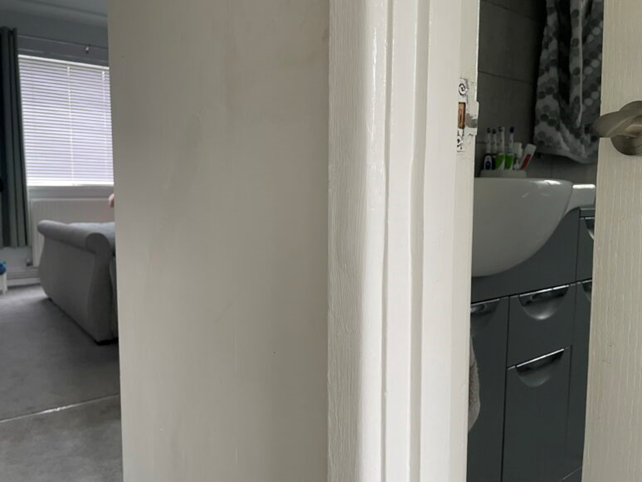
Not only did I have to use a heavy-duty hammer drill to remove the original tiles that were stuck on with cement, but I had a lot of trouble removing the bath, which was an old heavy, iron bath that was awkward to get out through the doorway. Unfortunately, whilst removing everything from the bathroom a fair bit of damage was done to the wooden door frame, as you can see in the picture above.
So that we didn’t have to replace the door frame, which would be an expensive undertaking, I’m going to show you in this tutorial how to repair damaged wood at considerably less cost than replacing an entire door frame by using wood filler and repainting. It’s a very simple job that even an amateur DIYER can undertake and complete successfully.
A note on metal packaging..
I chose to use wood filler and paint that comes in metal packaging because I understand that metal is formally accredited as a permanently available material and is therefore endlessly recyclable. Once you’ve used up the filler and paint, you can easily clean out any residue and use the empty cans for storage, upcycle them to create another project or recycle them.
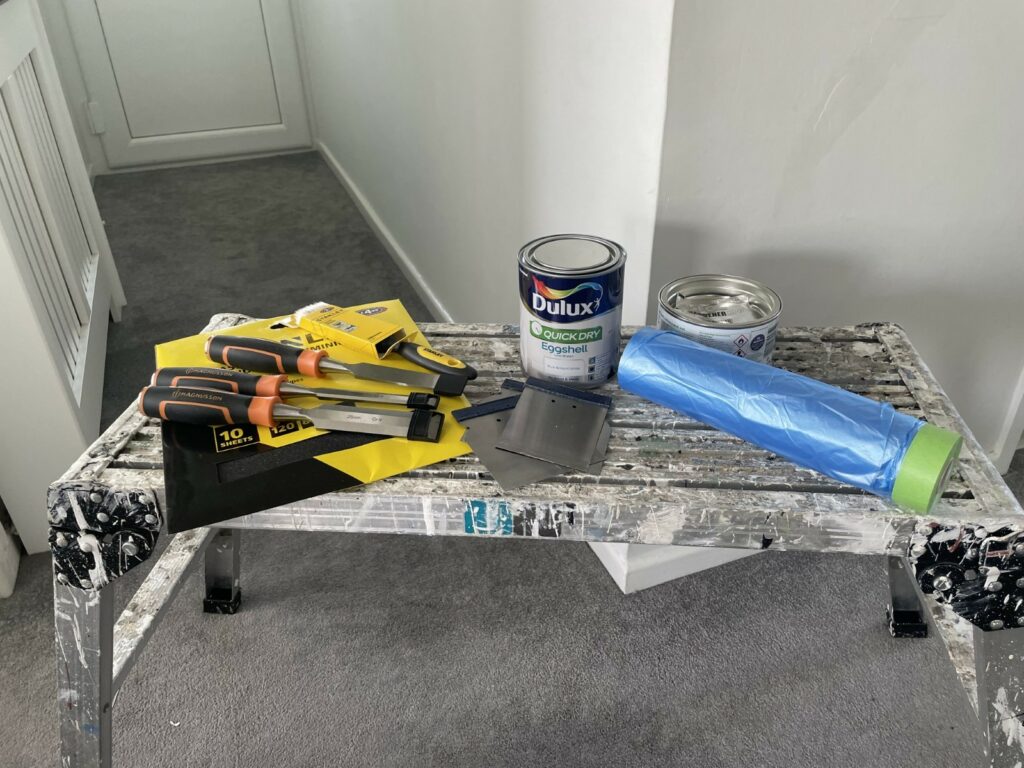
The tools and products you will require to complete the repair on your wooden doorframe are as follows:
1. High Performance White Wood Filler 275g
2. Pack of Sandpaper (assorted grades)
3. Harris continental wood filling knives (3 piece set)
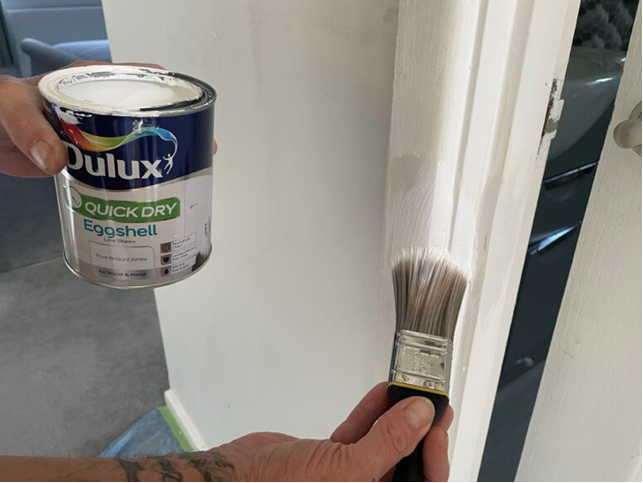
4. 1 litre tin of Dulux Quick Dry Eggshell paint
5. 1 x 1.5-inch paint brush
6. A wood chisel
7. Dust sheet
Now you have everything you need to repair your wooden door frame to make it look like it was never damaged!
Tip:
Before you start any repair make sure you put down a dust sheet to protect the carpets or wooden floor.
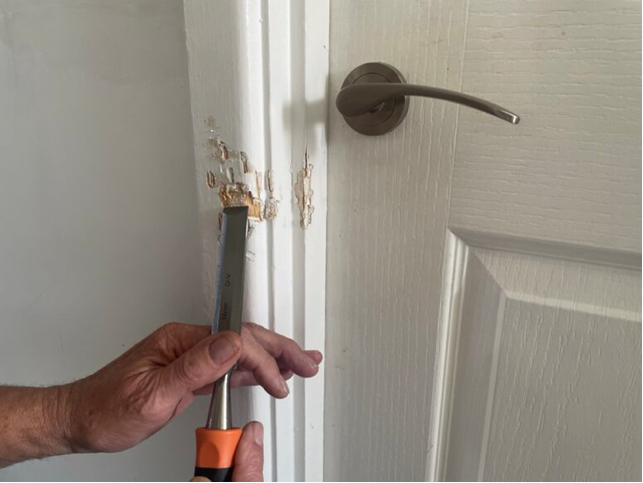
Step 1:
The first stage of repairing your door frame with Wood Filler is to prepare the area. It’s important to make sure that the area that requires filling has no loose or split wood, so first you must take some time to remove this. A perfect tool to use for this process is a wooden chisel. But please be aware that you must take a great deal of care when using it, as there is a high level of risk involved. Using the chisel safely, make the area as smooth as possible for the filling process.
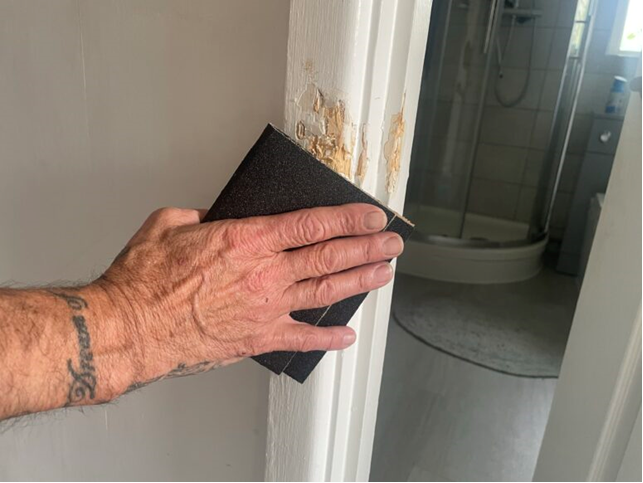
Tip:
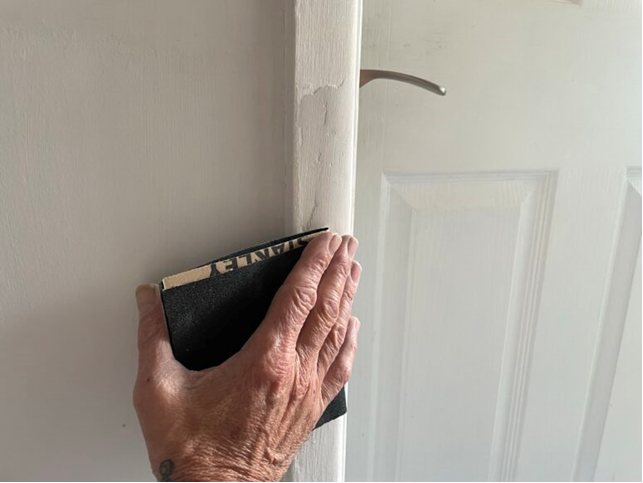
To make the area smooth as smooth as possible, sand down the area with your 60-grade sandpaper, which is a course sandpaper, before repairing.
Step 2:
You are now ready to fill the area with your chosen Wood Filler. Make sure you mix the wood filler as per the instructions on the tin.

Using your wood filling knives, smooth in the filler until the damaged area is filled. This will require a length of time to go completely hard. The length of time will depend on which filler you use, size of fill, environment etc. Therefore, please check the product guidelines.
Tip:
Try to match the colour of the door frame with the Wood Filler. My door frame was white, so I bought a white wood filler. The reason you want to do this is because it will be much easier to paint at a later stage.
Tip:
Always allow the filler to go completely hard before sanding the area to achieve the perfect smooth area.
Step 3:
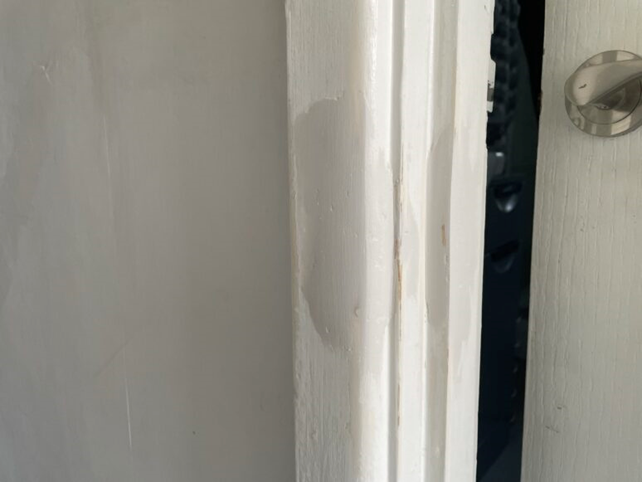
After allowing your filler in the damaged area to go completely hard, now it’s time to sand and shape the area using 120 and 80 grade sandpaper. Start with the 80 grade and then use the 120 grade sandpaper to shape and smooth down the filler until you have the desired finish.
Step 4:
You will now have a completely repaired door frame that is ready for painting. I used Dulux eggshell paint, as I love the quality of the paint and the metal packaging, which I can store and recycle easily. As you can see from the image you would never know it was damaged! (You can also add a primer before you paint to help the paint bind onto the surface, to reduce the need for multiple coats and to create a great finish.)
That is my quick inexpensive DIY hack and tutorial for repairing a wooden door frame which is super easy to achieve. Best of luck!
Blog by Nigel Higgins – DIY Daddy
Check out how to Paint UPVC with Bedec Multi Purpose Paint.


