I have started the task of emptying my mum’s house, as she recently passed away. There is nothing of much value in the house as my mum never collected or hoarded anything. However, I did find some interesting items. Although they have little value in monetary terms, they would now be considered vintage items.
After rummaging through cupboards and wardrobes I was quite surprised at some of the things that my mum had collected such as an old-fashioned vintage typewriter and an unopened bottle of vintage perfume from 1985, to name a few. I was genuinely surprised at what my mum had collected, as I never knew she had these items.
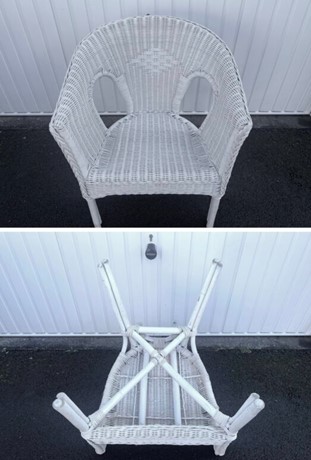
An item which I very much associated with my mum, as it was forever in her bedroom, was a vintage wicker chair. I spoke to some family members, and it transpires that the chair is at least 80 years old! The chair had apparently belonged to my grandmother prior to my mum having it in her home.
The chair for me has sentimental value, as it was always there in my mum’s bedroom, when I was growing up, and I vividly remember sitting in it as a child.
Of course, over the years, the chair has started to look very tired and, without doubt, needs renovation. It is very dusty, and the paint is discoloured and chipped.
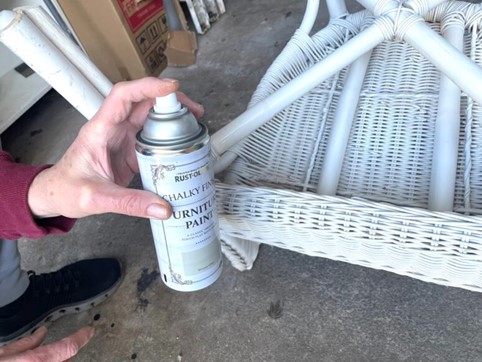
To renovate the vintage wicker chair, I will be using Rust-Oleum Furniture Paint. Using a brush on wicker will not give an even finish, so I will be applying the paint from a spray can, to get that perfect finish. The colour I will be using is Winter Grey.
I always choose metal packaging when buying Rust-Oleum Furniture Paint; this is because metal recycles forever and has a high recycling rate. Therefore, I know that I am doing my bit to reduce my waste. I also find cans easy to use and store, and their strength and barrier properties keep the paint fresh for a long time
So, now it’s time for my step-by-step guide tutorial for renovating a vintage Wicker chair. Are you ready?
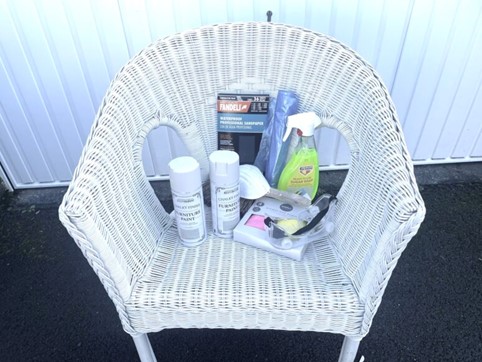
Products and tools required:
1. 2 x 400ml Rust-Oleum Chalky Finish Furniture Paint
2. Hard bristle hand brush
3. Selection of different grades of sandpaper (60-120)
4. Safety goggles
5. Face mask
6. Wash cloth and Sugar Soap
Tip 1:
It cannot be emphasised enough how important it is to prepare. The reason it’s important is to give you a perfect finish, so I highly recommend that you take your time to prepare the surfaces. Don’t cut corners, under any circumstances; you will regret it as the finish will not be perfect.
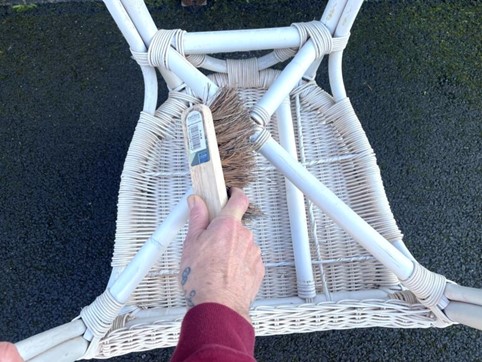
Step 1 – Brushing
The first step of the tutorial is to remove all the excess dust that has built up over the years. You will find that it is covered in dust on the legs and underneath the chair so using the hard bristle hand brush will remove as much dust and grime as possible.
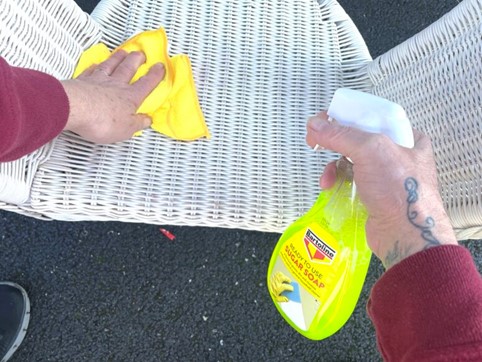
Step 2 – Cleaning
Once you have removed as much of the dust as possible, mix a solution of Sugar Soap and water and wash the entire chair to remove any wax, grease or grime. Then leave to dry thoroughly, before moving on to the next step.
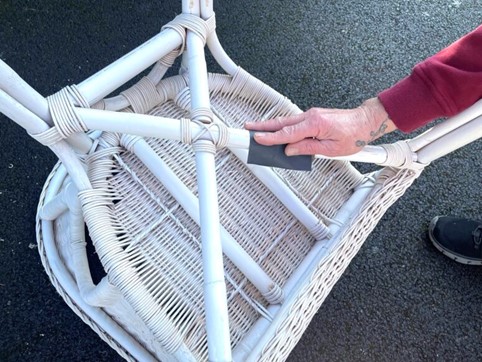
Step 3 – Sanding
There may be some flaky paint on your wicker chair so, using your sandpaper, sand down the areas that have any loose paint. This will help to achieve the perfect finish and will enable the paint to adhere to the chair, giving a perfect finish.
Step 4 – Painting
Stand the chair on a large sheet or a wide spread of newspaper so the paint doesn’t mark the surface it is standing on, and make sure there is nothing nearby that the spray could reach. You are now ready to paint your vintage wicker chair using the Rust-Oleum Furniture Paint.
There is an order to painting the chair. The first part to tackle is the underside of the chair.
Tip 2
As you are using a spray can of paint, I recommend that you paint the vintage wicker chair in a well-ventilated area. You should always wear a face mask and safety goggles as well.
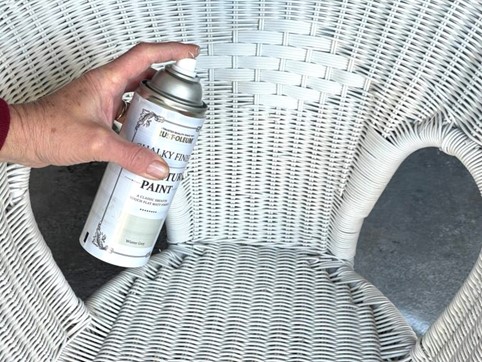
When using a spray can of paint you must always hold the can 30cm away from the object that you are painting. Always use even strokes and don’t spray for too long in one spot. Keep the paint flowing across the chair. Remember this is the first coat. A second coat is required, so don’t overload the vintage wicker chair with paint.
It will usually be ‘touch dry’ in around one hour and ‘fully dry’ in four hours. Once the underside is fully dry, it can be repainted.
Once you have painted the underside of the chair twice and it has fully dried, sit the chair on its four legs and repeat the process for the topside of the chair.
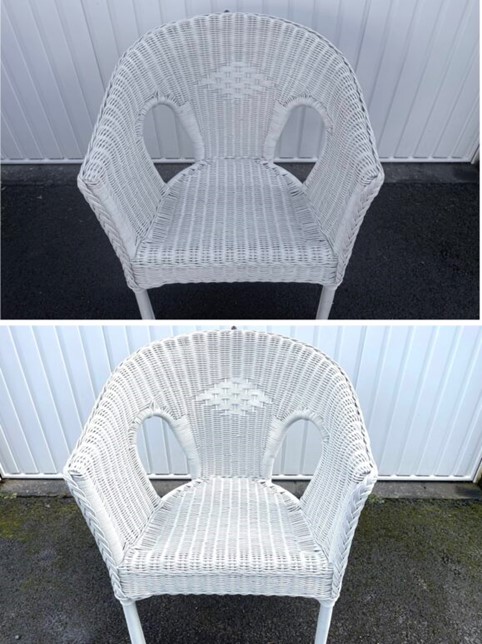
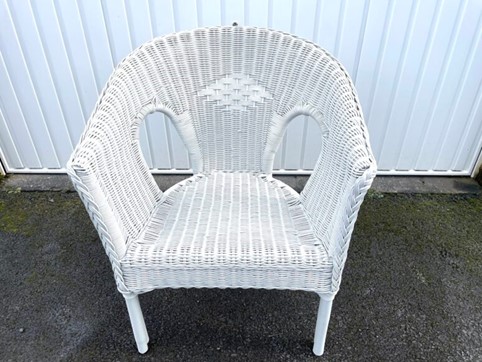
That is my tutorial to transform a vintage wicker chair using Rust-Oleum Furniture Paint. I hope you enjoyed it and that you can restore your vintage furniture to its former glory.
Blog by Nigel Higgins – DIY Daddy
Check out how to Paint Kitchen Cabinet Doors Using Rust-Oleum Kitchen Cupboard Paint.


