Victoria Fitz-Gerald – @fixing_up_58
Having completely gutted and transformed our Victorian London terrace along with my wood-working extraordinaire husband (“Mr-58”) we consider ourselves highly experienced DIY-ers. I document our progress alongside publishing step-by-step tutorials on my social media profiles, utilising various #gifted products along the way. I have a love for the old and a passion for reusing and recycling wherever we can, whilst making savings along the way, then sharing those ideas.
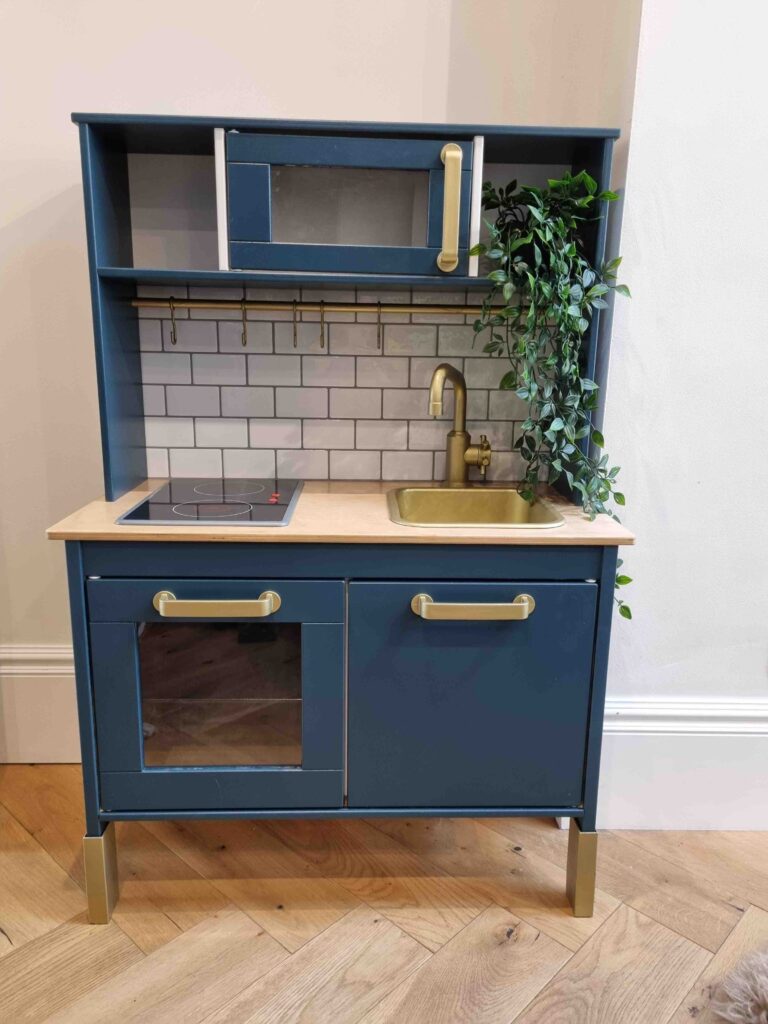
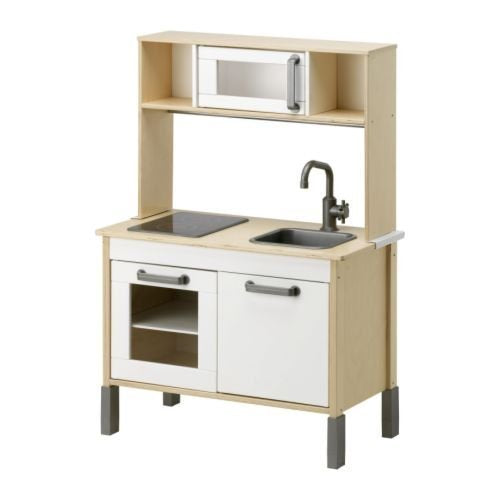
For my son’s 2nd birthday, I knew a play kitchen would be the answer to him rummaging through my cupboard while I cook – instead he can rummage through his own! But the nice-looking ones are expensive, so I opted for a less expensive version and decided to pimp it! You can use a second-hand play kitchen for this to save extra £££’s, but I pimped it from flatpack. And the best thing is you can make it match your own kitchen!
Here’s what we used…
- Kids play kitchen, preassembled, or flat pack
- Hammerite Metal Spray paint, Smooth Gold
- Zinsser interior and exterior primer, White
- Rustins Wood Dye
- Dulux Trade metal paint, Diamond Eggshell
- Dulux Trade wood paint, Gabled Blue
- Rust-Oleum Painter’s Touch spray paint, Black
- Rubber gloves and rag
- Electric screwdriver (if assembling from flatpack)
- Paint brush
- Roller
- Paint tray
- Sheet of thin mdf
- Stick on tiles
- Stanley Knife
- Nail Gun
- Faux trailing plant for decor
And here’s how to turn this…
..into THIS!
STEP 1: Spray away the grey
One of the easiest ways to give this play kitchen a facelift is by spraying the grey handles, bowl, tap, pole, hanging S-hooks and feet. You could use any colour here, but to match my kitchen I went for a matt brass (“smooth gold”) finish, in Hammerite’s metal spray paint.
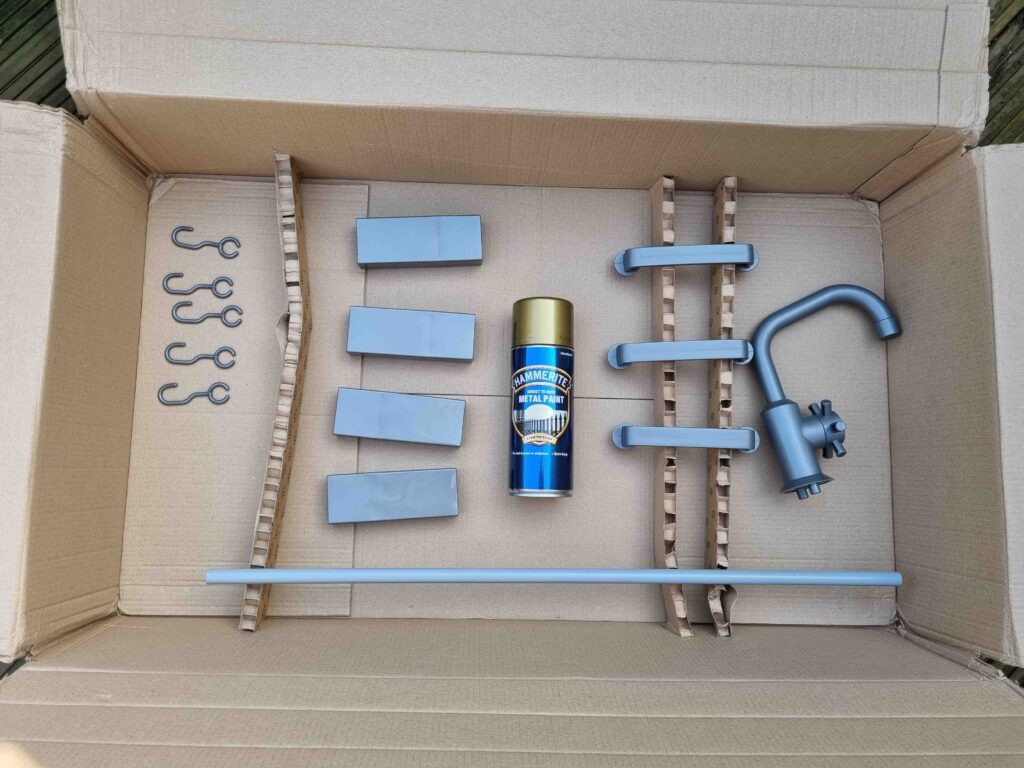
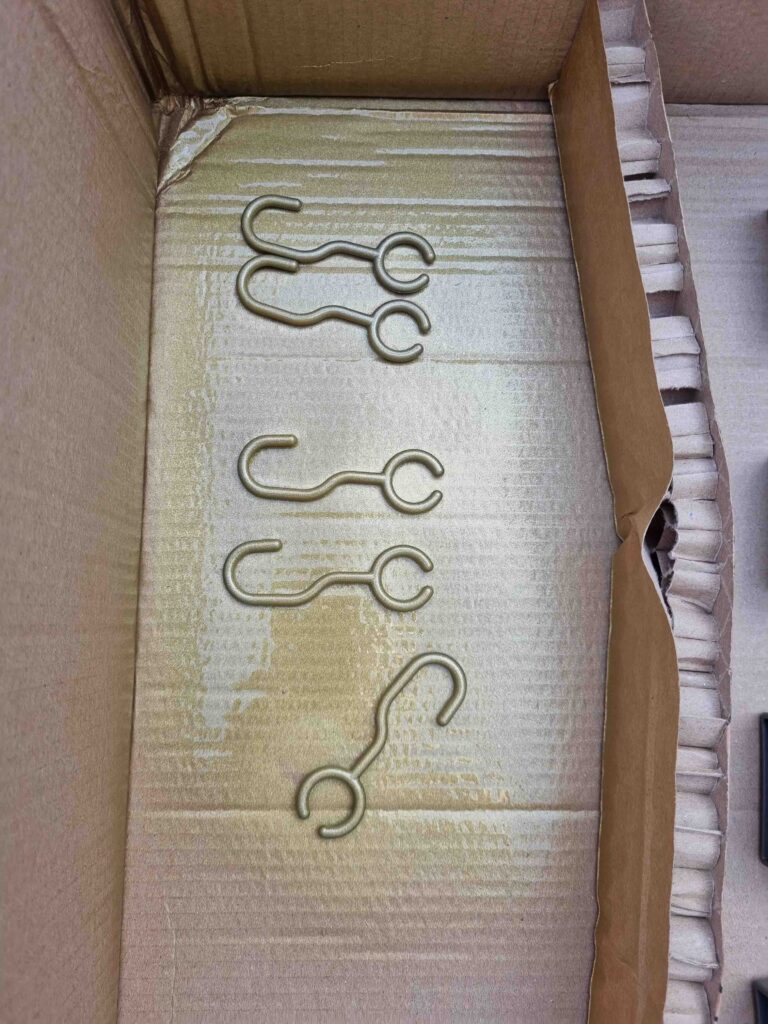
The plastic and metal doesn’t need any prepping, but my suggestion is to use a big cardboard box to contain the spray, and ideally you want to spray outdoors. Have some patience and do multiple light sprays to avoid clumps and drip lines, this also helps it to dry more quickly. You’ll find they feel really tacky until fully dry, so leave as long as you can between sprays, and don’t turn them over to spray the other sides until the tackiness has gone, or it will stick to whatever it touches, and peel off!
You’ll need to keep doing this between all the following steps, but it’s good to get this ball rolling nice and early, you may need 3 coats of each side, so keep on top of it.
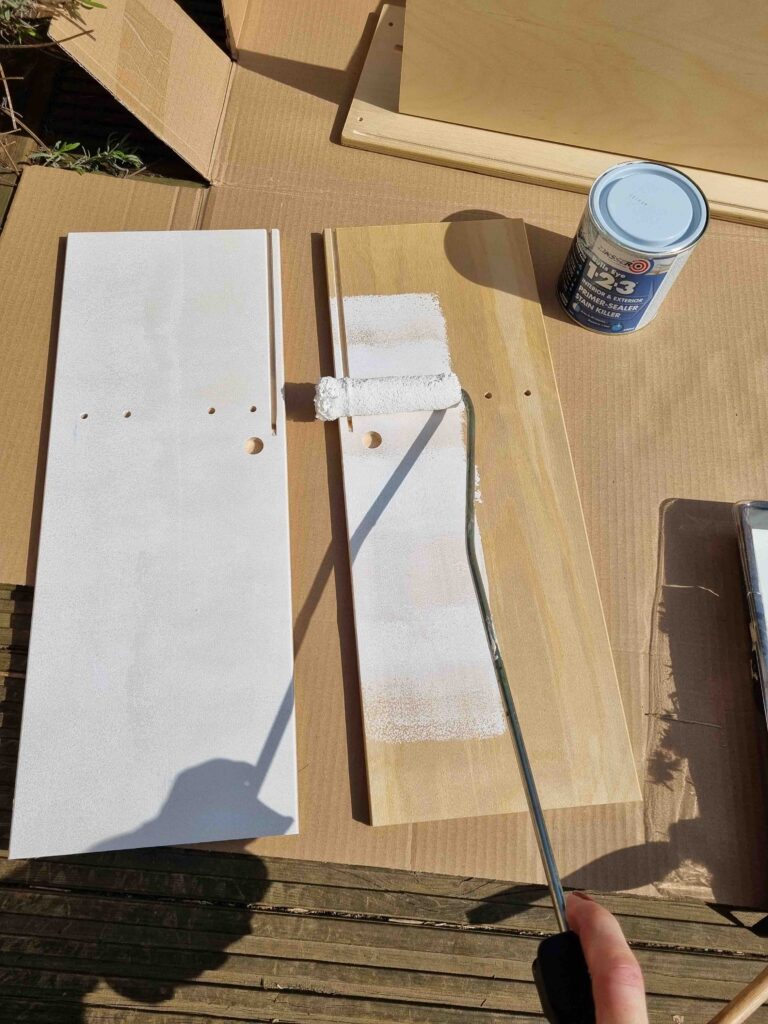
STEP 2: Primer time…
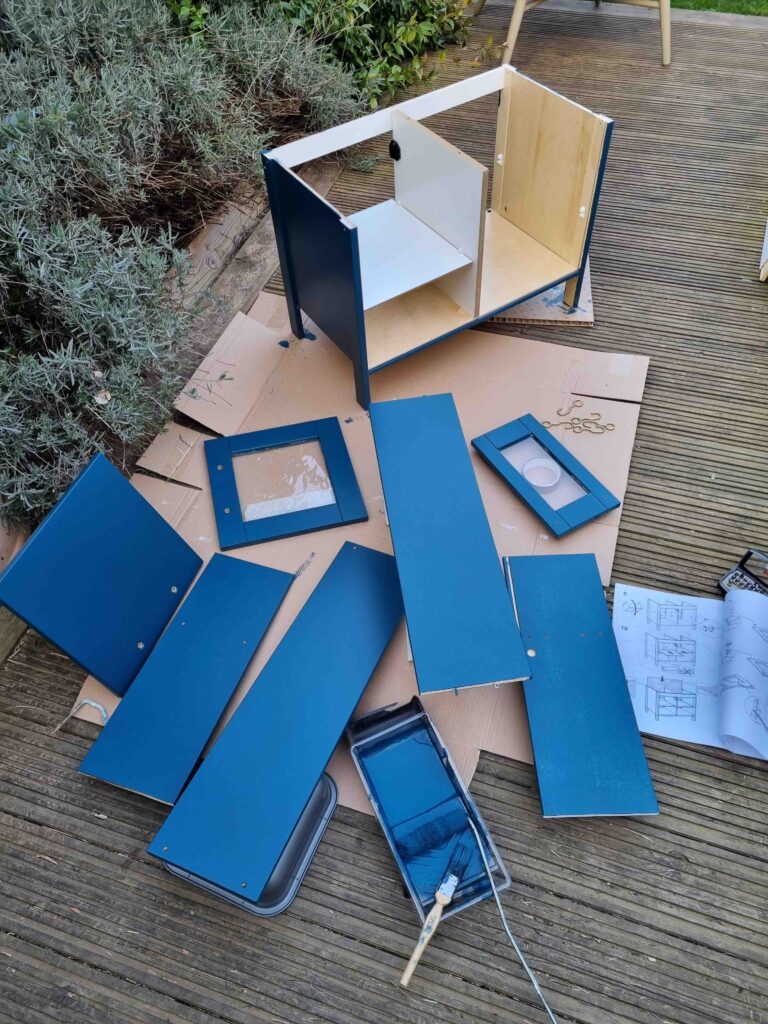
I decided to build the base frame of the play kitchen to paint its sides.
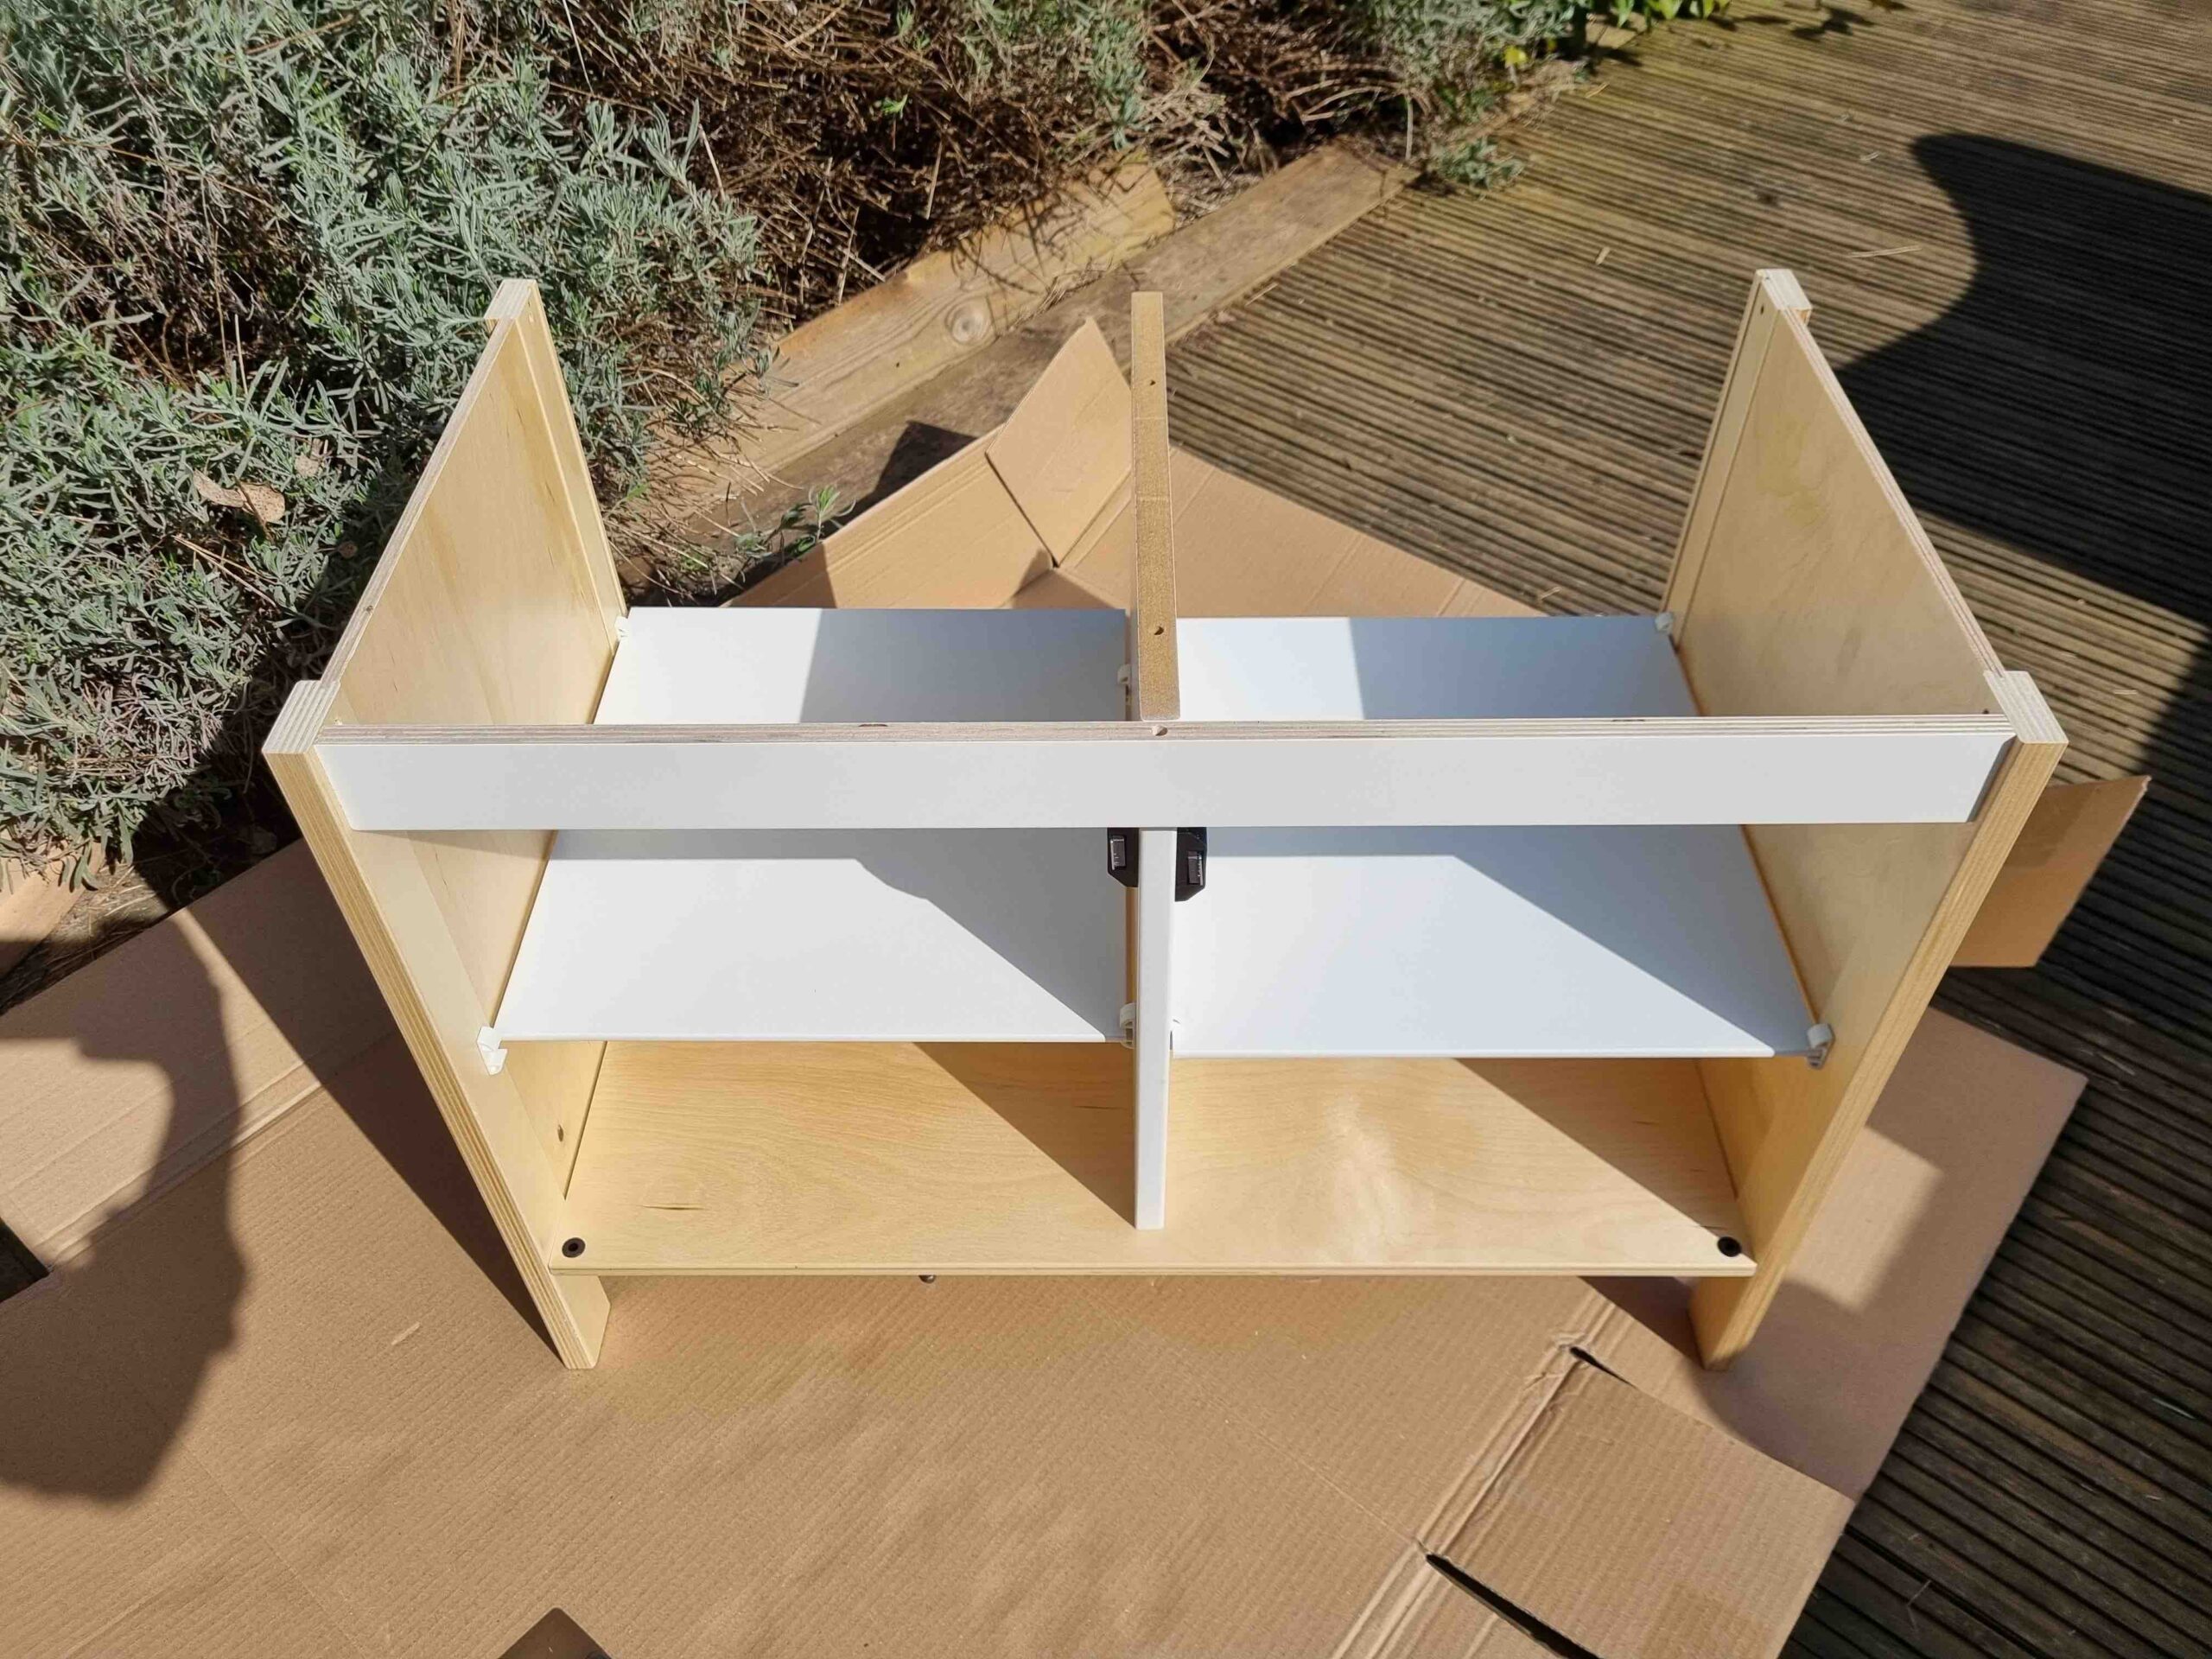
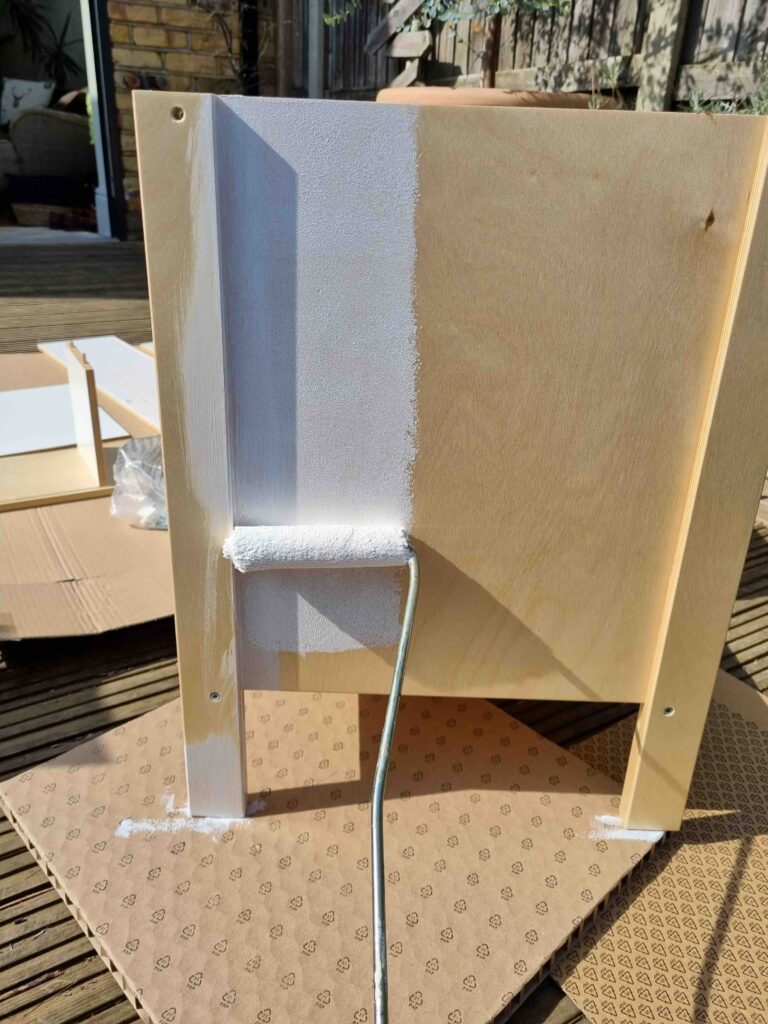
You’ll need 2 coats of primer to really protect and prepare the wood (after all, this is likely to have a toddler bashing at it for some years!), and using the roller is both quicker and gets a smoother finish.
I decided to only paint the exterior of the base. Whereas for the top section I wanted the sides and the shelf either side of the “microwave” to all be colour coordinated on both sides, so make sure to prime all areas that you want coloured.
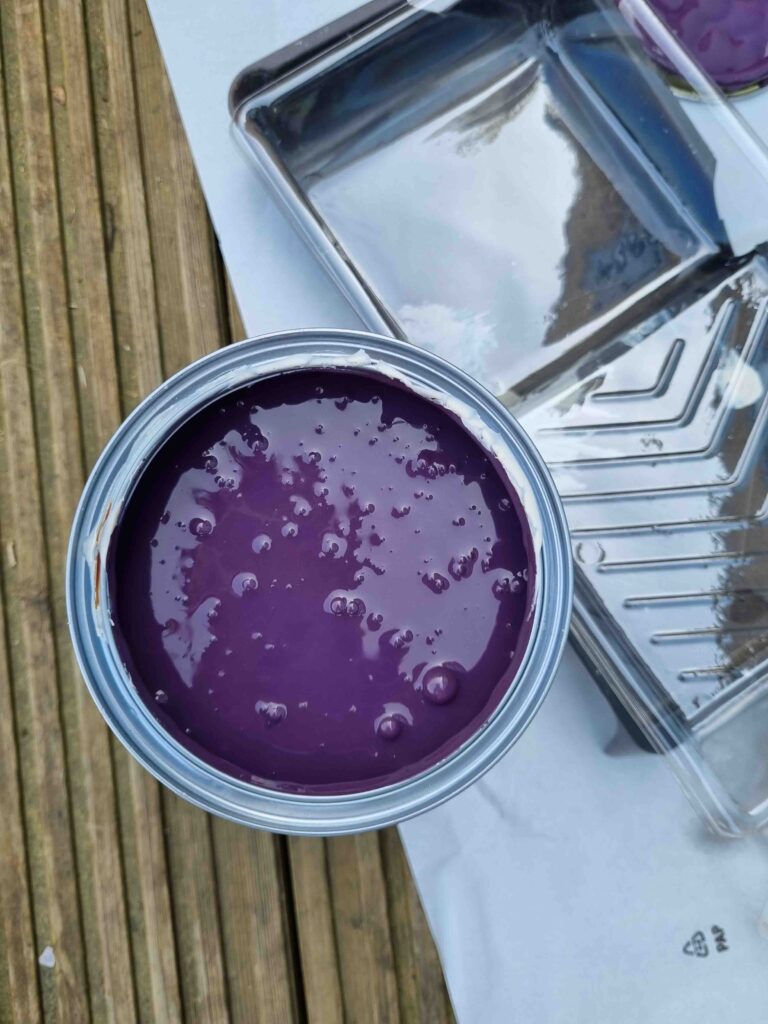
STEP 3: (Check, and) Apply your paint
I initially decided to colour match to my blue kitchen, I had some spare board which was an offcut, so took it for colour matching. But when I went to open the paint it was purple! Fortunately, when I took it back they could see what a poor match it was, and suggested it was due to the shine on the board. So, I ended up choosing from their standard colour range, and fortunately Dulux’s colour range is EXTREMELY extensive, so I found the perfect colour to match (Gabled Blue 70BG 07/086) – you’d think it was the same paint! But if you’re colour matching I’d suggest checking in store before leaving!
Once that drama was over I could crack on with the colour. Again, using the roller will really help get that nice smooth finish, using the paint brush for edges and corners.


The doors with the Perspex are a little more tricky to get perfect, my suggestion to help with this is to use a very small paintbrush and really get in and around the Perspex, otherwise the white still shows through. It’s really easy to clean the paint off the Perspex afterwards without snagging the paint so don’t worry if you make a mess – just use a wet piece of kitchen roll to clean the Perspex.
You definitely need 2 coats of this paint, but there may be some areas where a 3rd coat would be beneficial.

STEP 4: It’s all in the detail…
I had a bit of a last minute idea to paint the inside tray of the “oven” in black, to really give it the look of an oven. If you wanted to go further you could paint the bottom and sides of the cupboard too. I used Rust-Oleum painters touch black spray paint, it wasn’t a big job but I was really pleased I did it, it’s another one to do in slower coats. I painted both sides, just to ensure good coverage.

STEP 5: Stain the worktop
As I was looking to create a mini version of my own kitchen I decided to stain the worktop a darker colour to match the oak in my kitchen. To do this I used Rustins Wood Dye in Medium Oak.

Because I was staining a brand new worktop, I knew the varnish that had been pre-applied would be consistent, and not patchy. However, if you are using a second-hand kid’s play kitchen I would recommend fully sanding down the worktop before staining or dyeing it.
I used the back of the worktop to patch test it, and make sure I was happy with the colour, and how many coats it would need. I always use my husband’s old work shirts as rag for application, they give a nice clean and consistent finish to wood stain.
And I highly recommend wearing protective gloves to prevent your hands from looking tango’d!

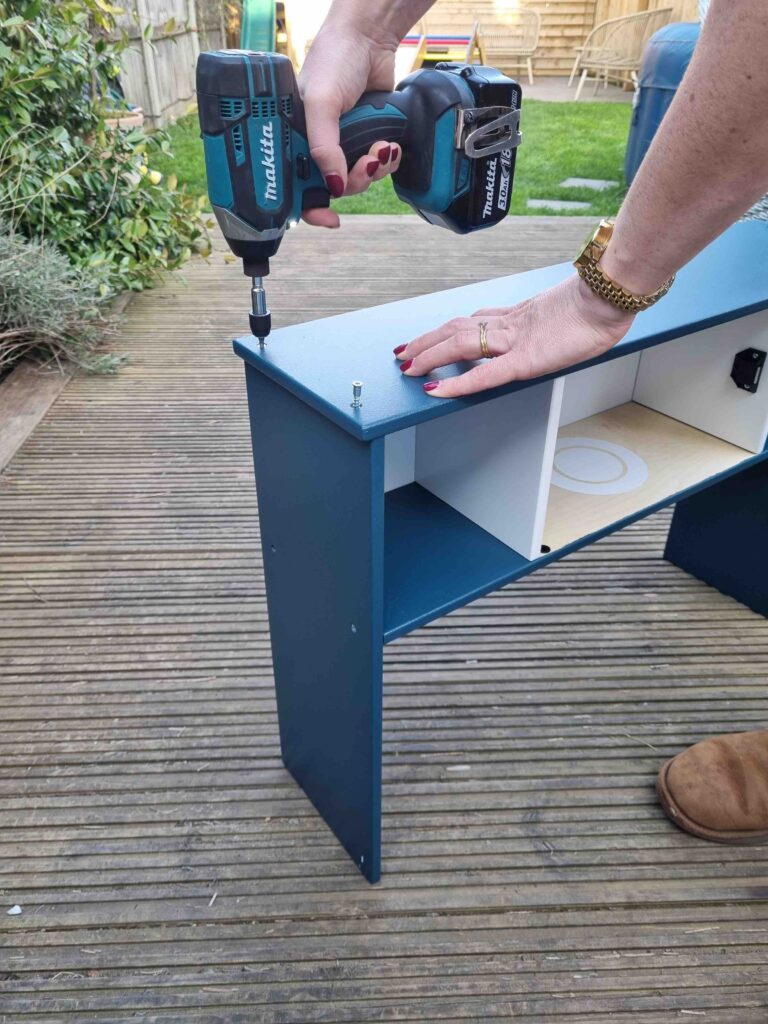
STEP 6: Assembly time
Once everything is painted, sprayed and stained to your satisfaction, and (crucially) is totally dry, you can start to assemble the whole play kitchen. Touch ups can always be done later so don’t worry too much if there are areas that still need some attention.
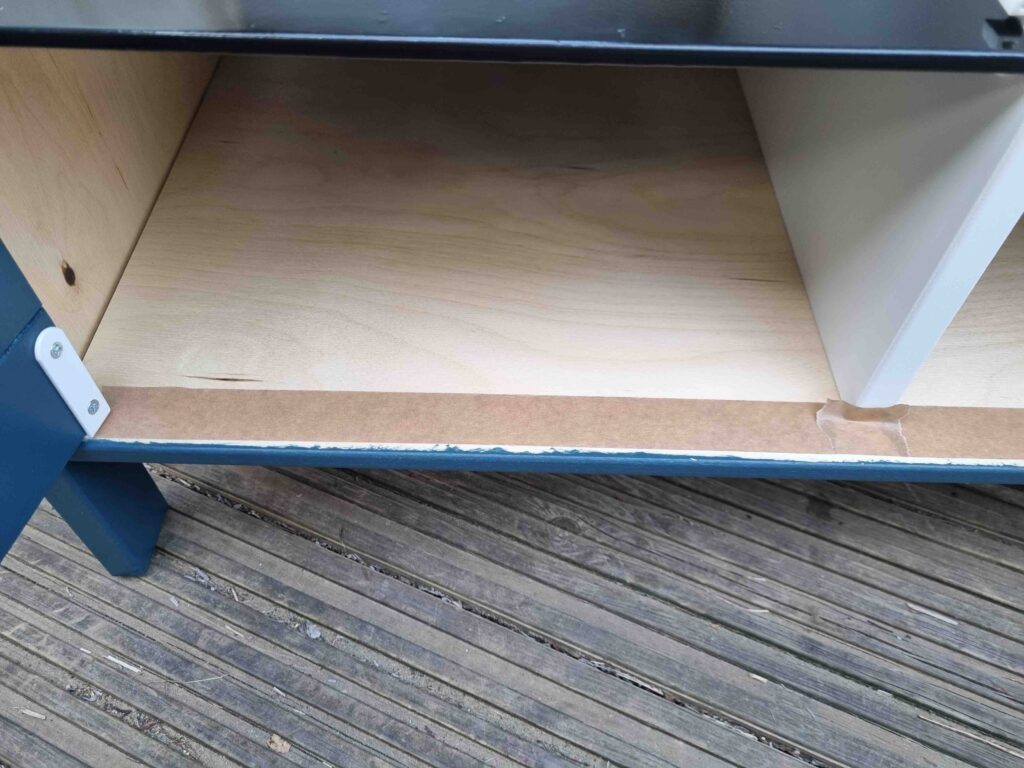
You will most likely find that once you’ve assembled the play kitchen there are some areas that require some further work. For example, when hanging the doors on the oven & cupboard you’ll need to paint further inside to prevent the wood showing through when the doors are shut. I applied some masking tape to get a nice straight line. You’ll need to paint further inside than you might expect.
General touch ups are a good idea at this point.
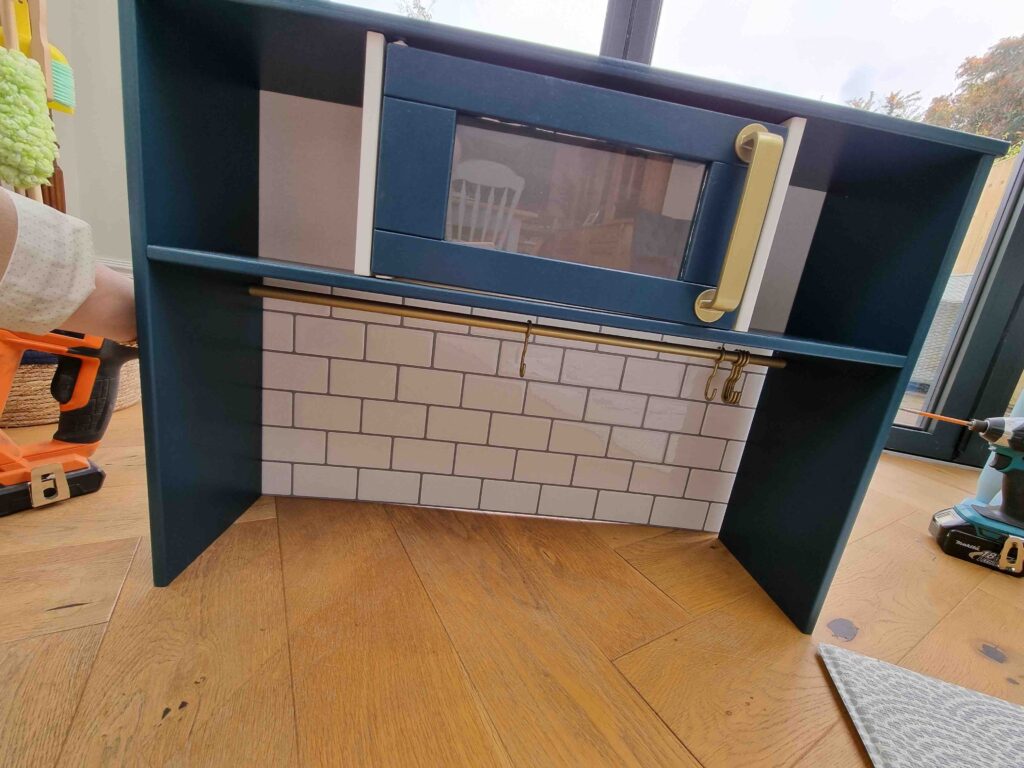
STEP 7: Tiling cheat
This step really elevates the whole look of the play kitchen, as well as preventing your little one’s kitchen equipment from constantly dropping down the back!
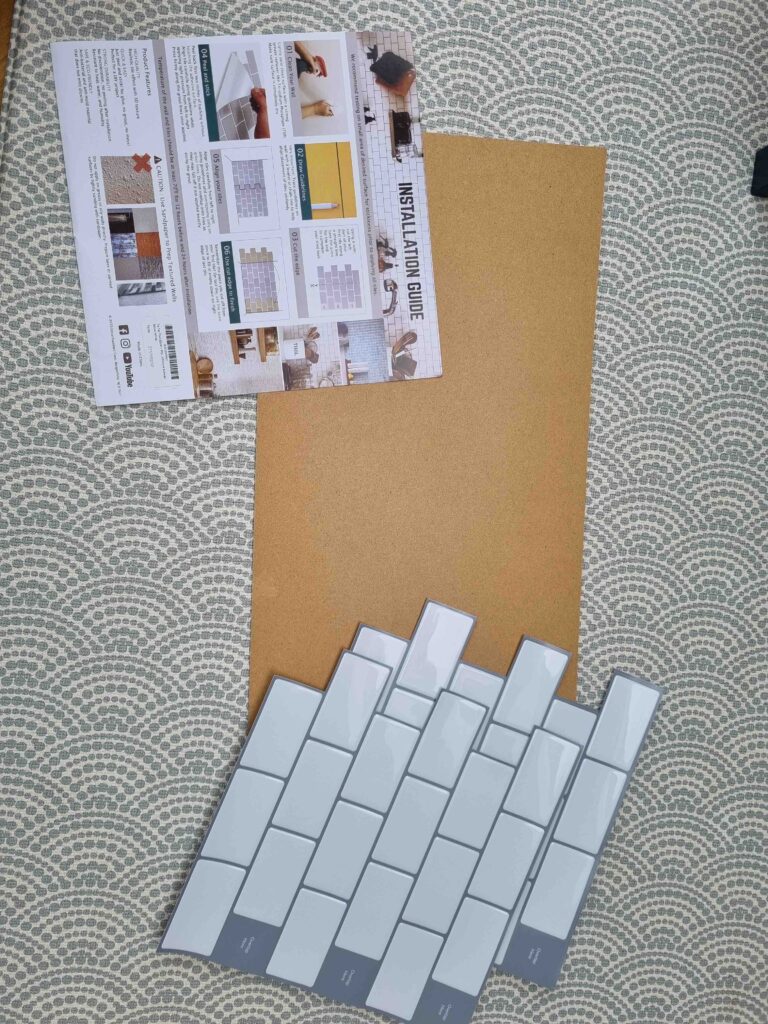
I ordered some stick on tiles and rummaged through our shed for some spare MDF.
Conveniently I found some that was already painted white on one side, which I used for the outside, in case it is ever placed somewhere visible.
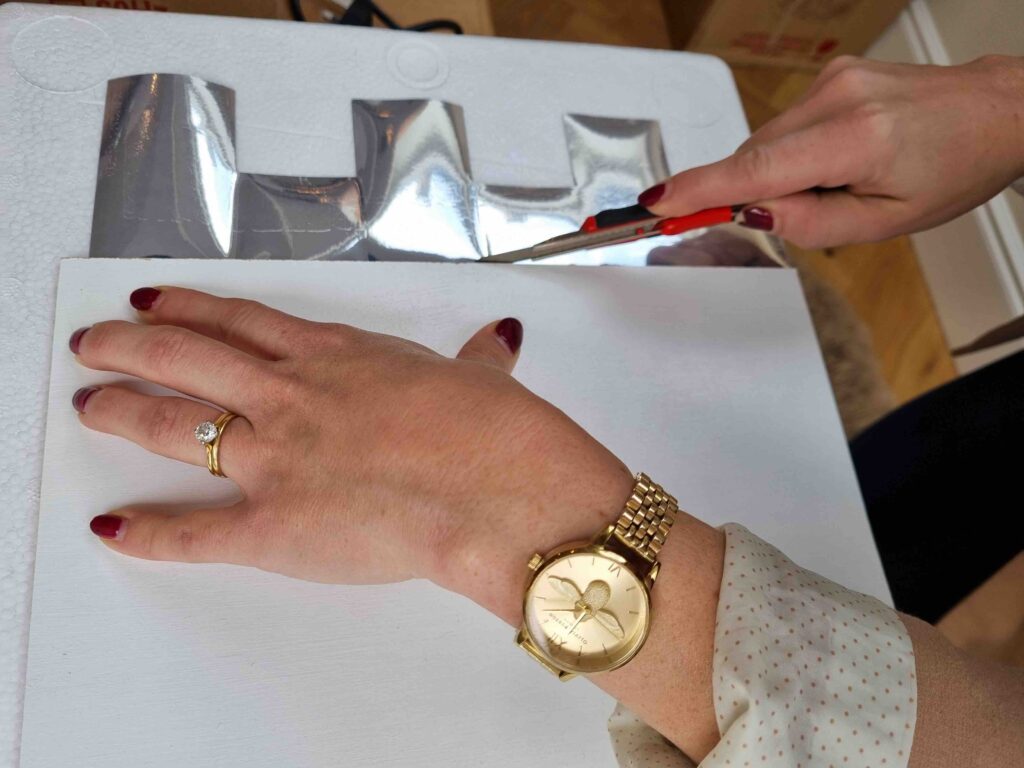
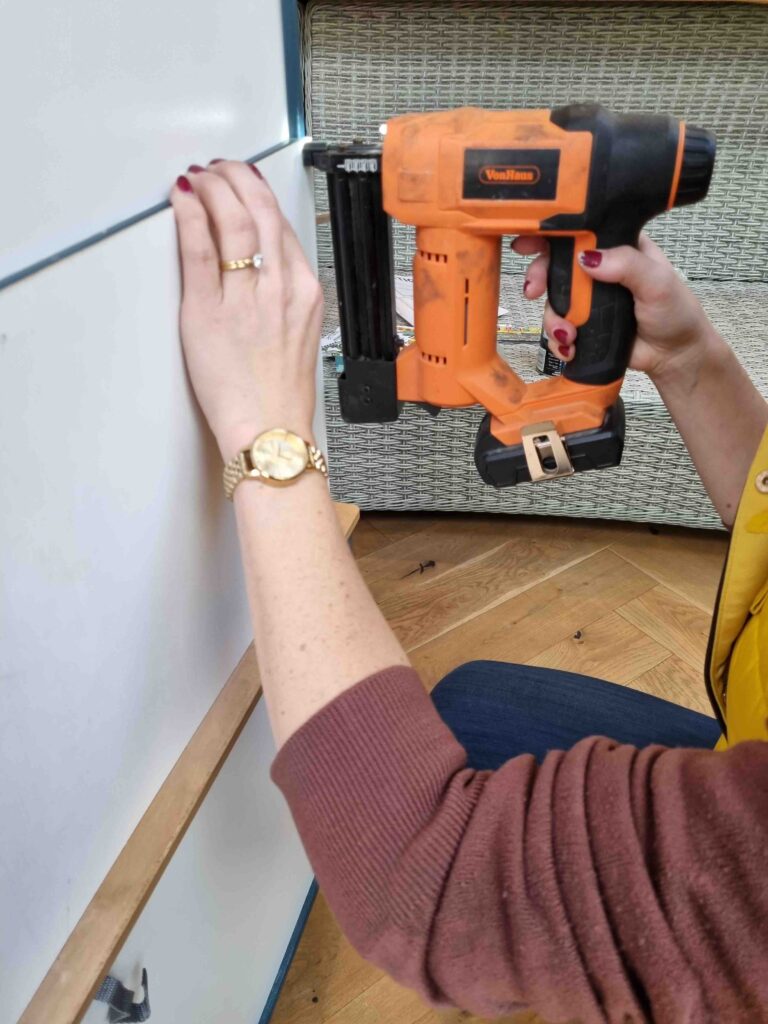
We cut the MDF to the size of the hole, allowing enough overlap to pin nail it in place to the play kitchen frame. Then followed the instructions on the tile packet to stick them on and trim them at the end – you might need a spare pair of hands to help with this stage.
TOP TIP: trim the overlapping tiles on some spare polystyrene that the play kitchen was delivered in! Then you can pin it into place using a nail gun…
STEP 8: Dress it, wrap it and gift it to your excited little one!