By Helen, Whitewood & Linen
Of all the recycled materials I use in my craft room, metal cans are a firm favourite. Today, I am going to show how you can turn a few basic food cans, destined for the recycling bin, into a beautiful and inexpensive festive floral centrepiece for your Christmas dining table.
Even though a finished food can is a fully recyclable, it still gives me a satisfying buzz to reinvent its purpose. Although I tend to favour storing pens, pencils and all manner of stationery in my clean cans, sprucing them up and seasonally decorating them for my dining table, has to be my favourite win yet.
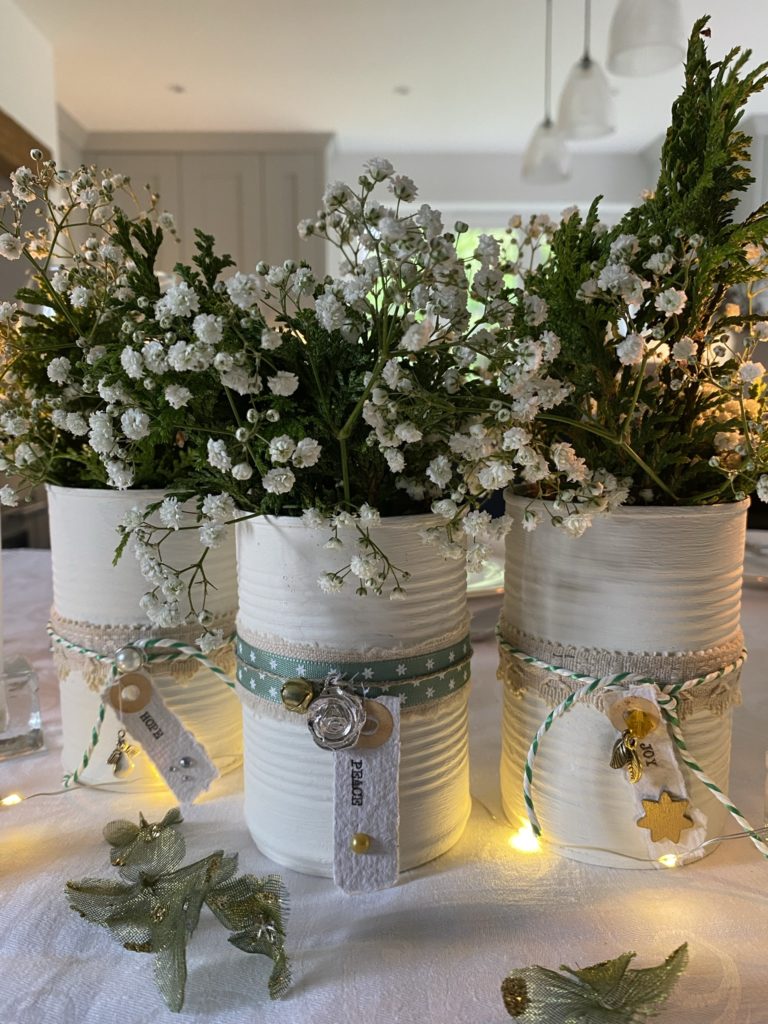
For your festive centrepiece decide on your colours and theme and gather together all you will need to complete your craft. I decided to keep my colours neutral and festive, choosing greens and off-whites with a dash of shiny silver and gold for added sparkle.
Equipment list
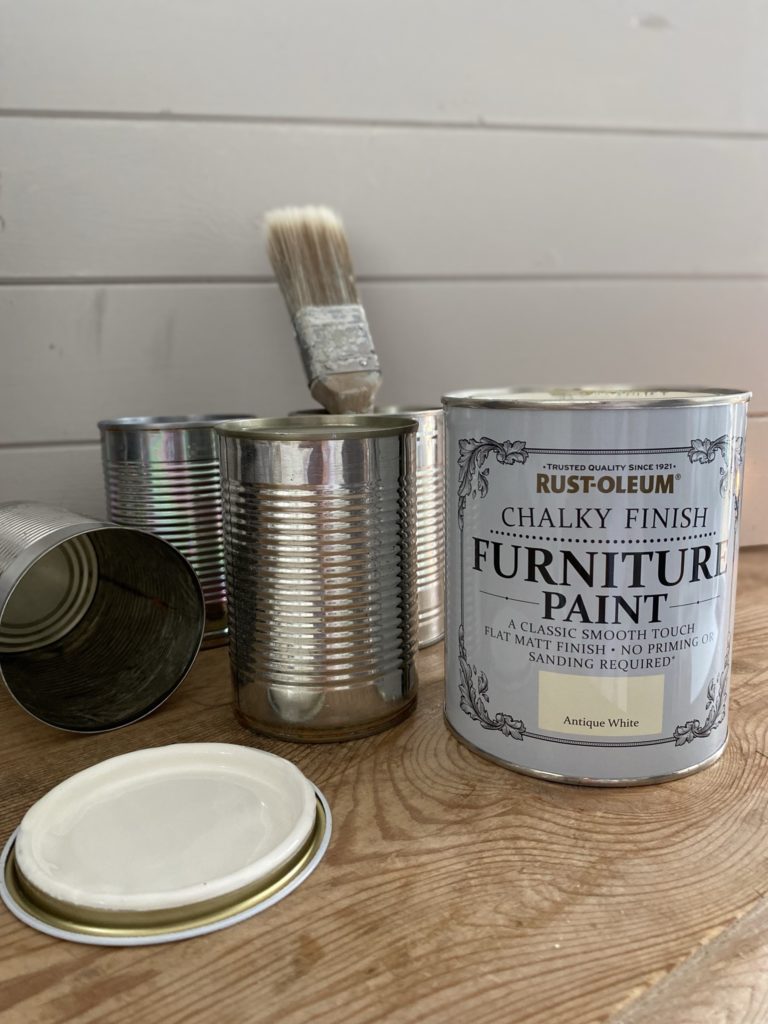
- Three washed and dried empty food cans; I used baked beans and tomato tins with the labels soaked off
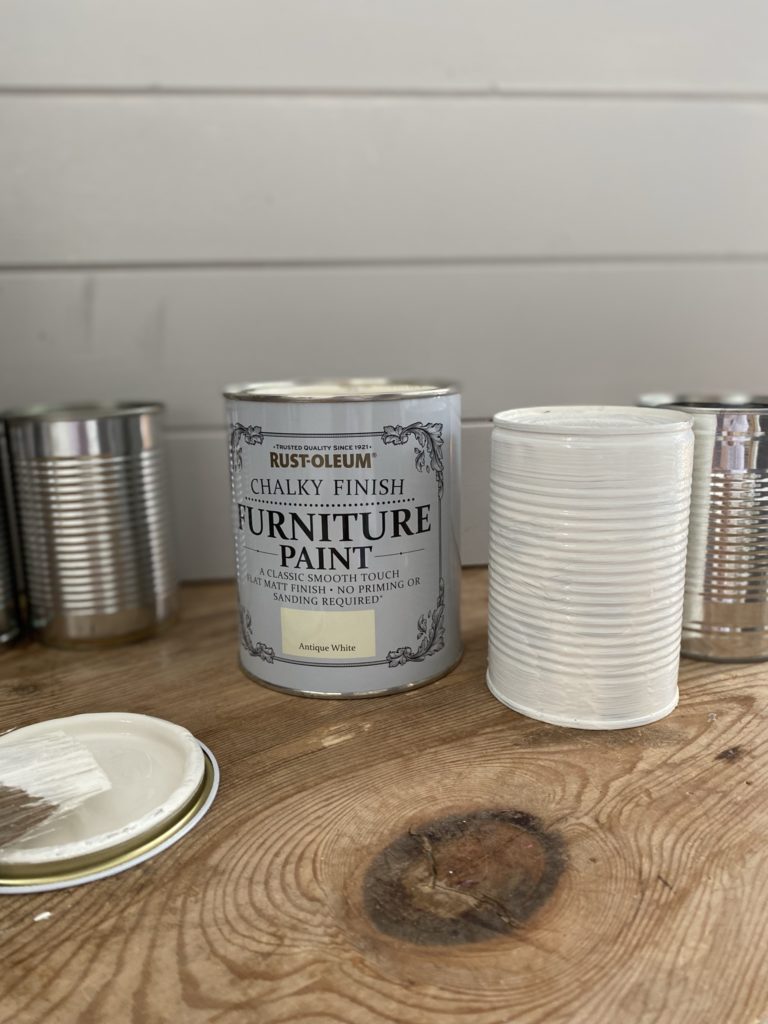
- Paint; I used Rust-Oleum Chalky Finish Furniture Paint in Antique White.
- Glue; I used Coconut & Cotton Glue.
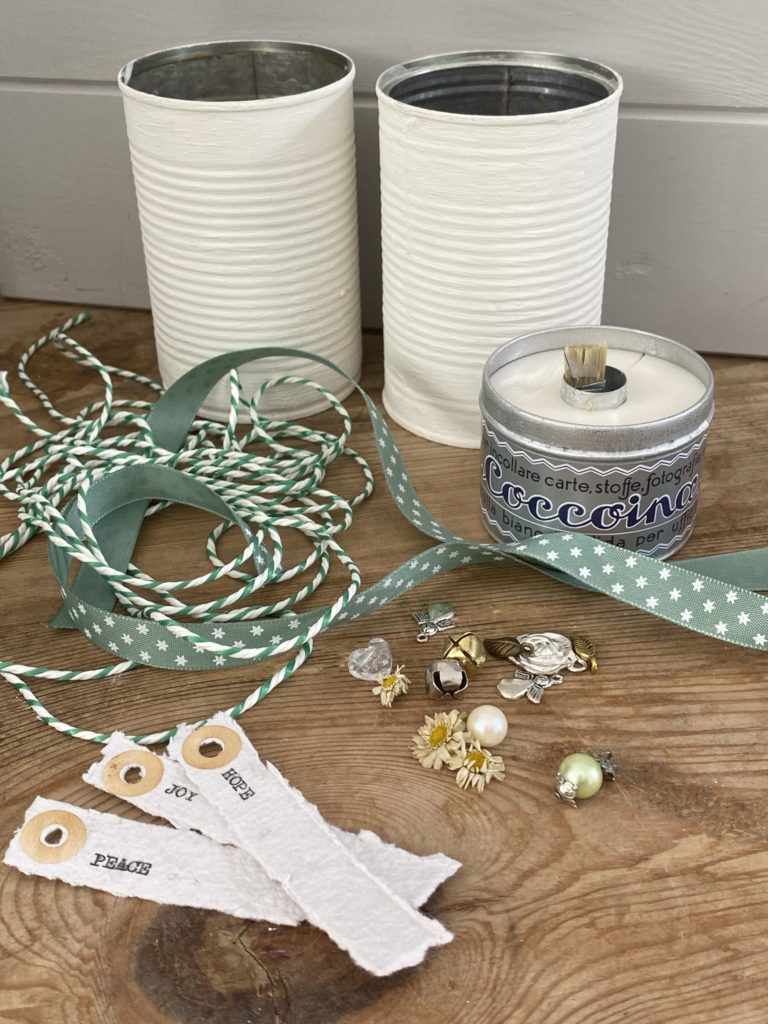
- A selection of recycled ribbons, lace and string
- Embellishments – such as Christmas cracker ornaments or broken jewellery
- Scraps of handmade paper
- Paint brush
- White cotton thread
Step 1
Begin by painting each metal can with a thin coat of the chalk paint, allowing it to dry completely before repeating twice more. I’ve used Rust-Oleum’s Chalky Furniture Paint in many of my previous projects and find that it gives the perfect rustic look I prefer.
Plus, since the product itself is stored in a metal can, it doesn’t spoil, lasting for a great many future crafts.
Step 2
Next choose a length of ribbon long enough to wrap around the middle of the tin to form a base, then use another different coloured ribbon or string on top to create a layered effect.
Hold the layers in place using glue, which I have applied amply all the way around the can.
I’ve used Coconut & Cotton’s glue which is 100% plastic free and extremely strong and comes in another useful metal tin I shall enjoy reusing when I’ve finished its contents.
Step 3
For some of my ties, I used torn linen rag ribbons left over from pervious project which I’ve had squirrelled away and I also pulled out this recycled bakers’ twine which was once wrapped around a parcel. The look is completed with some green ribbon with festive stars left over from last year’s Christmas wrapping.
Step 4
Once everything is nicely secured, you can turn your attention to your finishing touches.
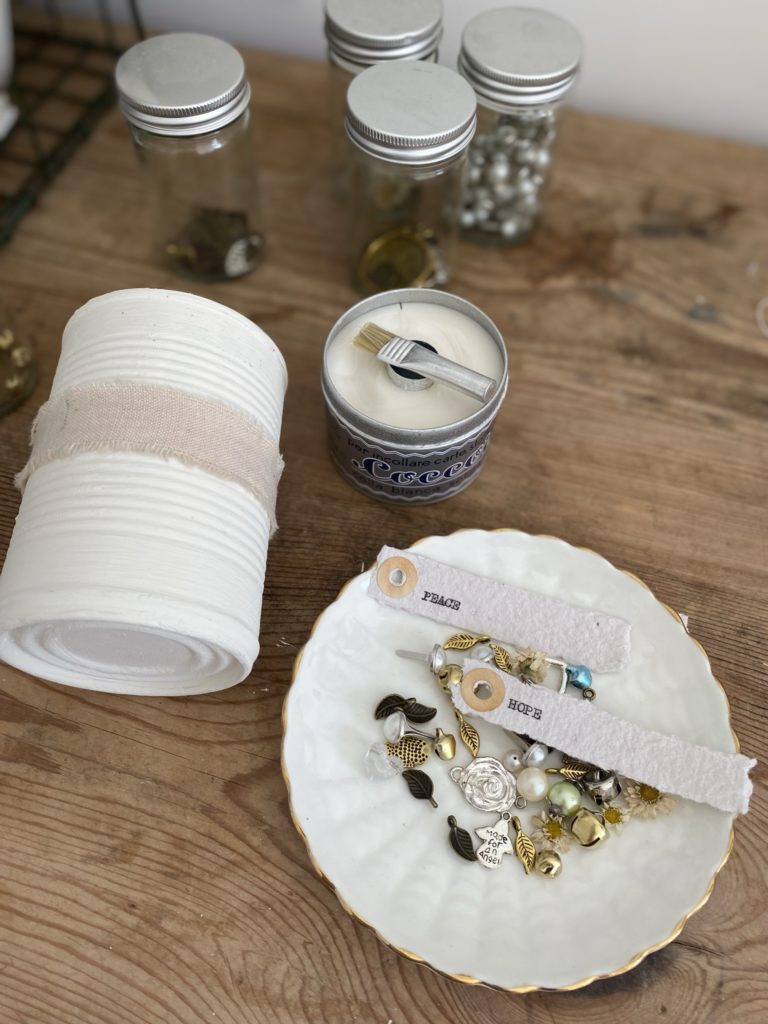
On my cans I’ve used a combination of treasures I’ve amassed over the years such as broken costume jewellery or trinkets from old Christmas crackers. I’ve mixed gold and silver embellishments to add a little sparkle to each metal can.
In addition, to add a further personal touch, I dusted off my old typewriter and using some handmade paper I typed up a Christmas wish for each of my guests. I then tore the paper, instead of neatly cutting it, to add a vintage vibe. To finish the tags, I added hole reinforcers which I’d soaked in cold coffee to give a brassy effect.
Tie all your embellishments and tags using a thin piece of white sewing cotton, barely noticeable when the craft is complete.
Top tip
Of course, this craft can be adapted to your own personal Christmas colour scheme. If you favour a bright tablescape, then simply choose bold colourful paint and decorations accordingly. If you prefer one colour, try experimenting with the textures of your trimmings to get the look you are after.
Step 5
Next fill your festive cans – and now you are only limited by your imagination!
I love to see a cloud of gypsophila on the table at Christmas and added a few snippets from the garden to complete the look. Festive candles or three tiny poinsettias would also work well, as would white roses and ivy gathered from the garden.
I look forward to seeing your festive centrepieces – make sure you tag us with #doitwithcans on social media!


