Nigel Higgins – DIY Daddy
I’m sure all of us have old pieces of furniture that have seen better days and are in need of some TLC. I have a magazine rack that has definitely passed its best and is in need of some updating. That’s why I will be upcycling our magazine rack to use in our home by painting it with Rust-Oleum furniture paint with a satin finish.
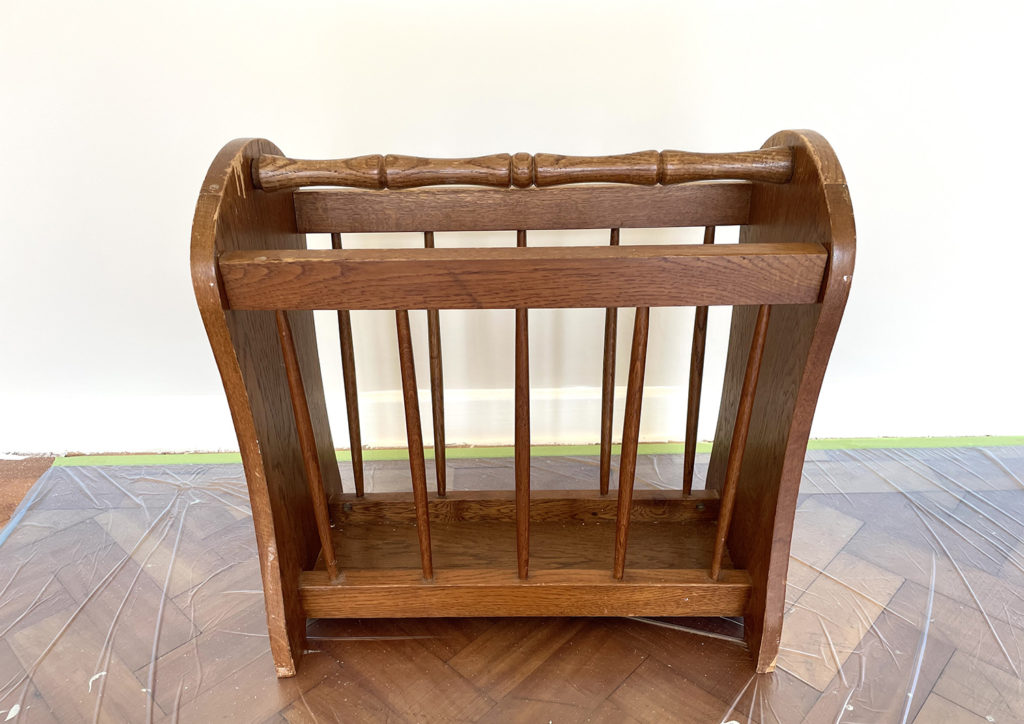
By upcycling old furniture, you can reuse something rather than condemning it landfill, which is beneficial to our environment as well as giving it a fresh update so that it matches your current décor. Even though this magazine rack has seen better days, I know by the time I’m finished it will look right at home.
The key to an upcycling project is all in the preparation and I’ll go into detail in the step-by-step guide below.
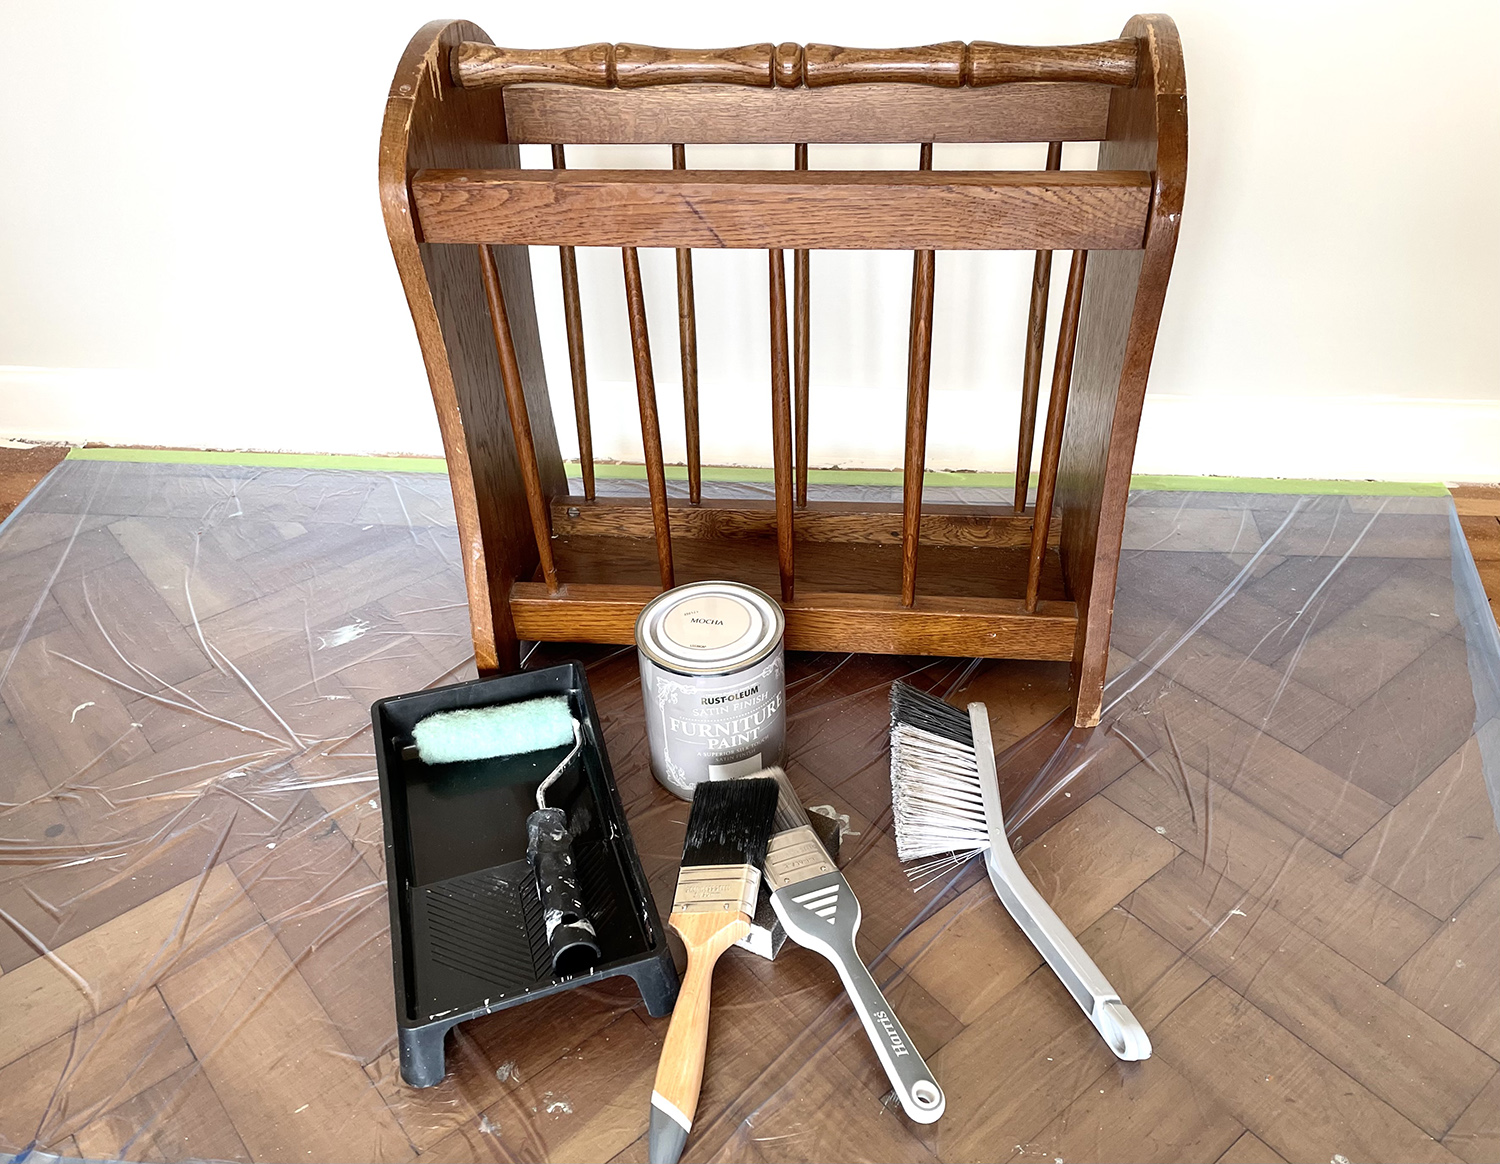
But before we begin, I’m using Rust-Oleum furniture paint which comes in a range of colours and finishes – satin, matt or chalk. It’s also in a metal tin which is handy for storing the paint. I’ve used the same paint colour for numerous upcycling projects.
Once empty, the metal paint tin can be recycled. Did you know that metal recycles forever? As a permanently available material, this means it can be recycled indefinitely without the material properties ever changing.
Let’s start the step-by-step tutorial. Follow my steps and I’m sure you will be very pleased with the final result.
Equipment list
- Rust-Oleum furniture paint – satin finish and 750 ml tin.
- Rust-Oleum furniture wax – clear finish and 400ml tin.
- 80 grade Sandpaper
- 80 grade sandpaper
- Brush – 2 inch brush
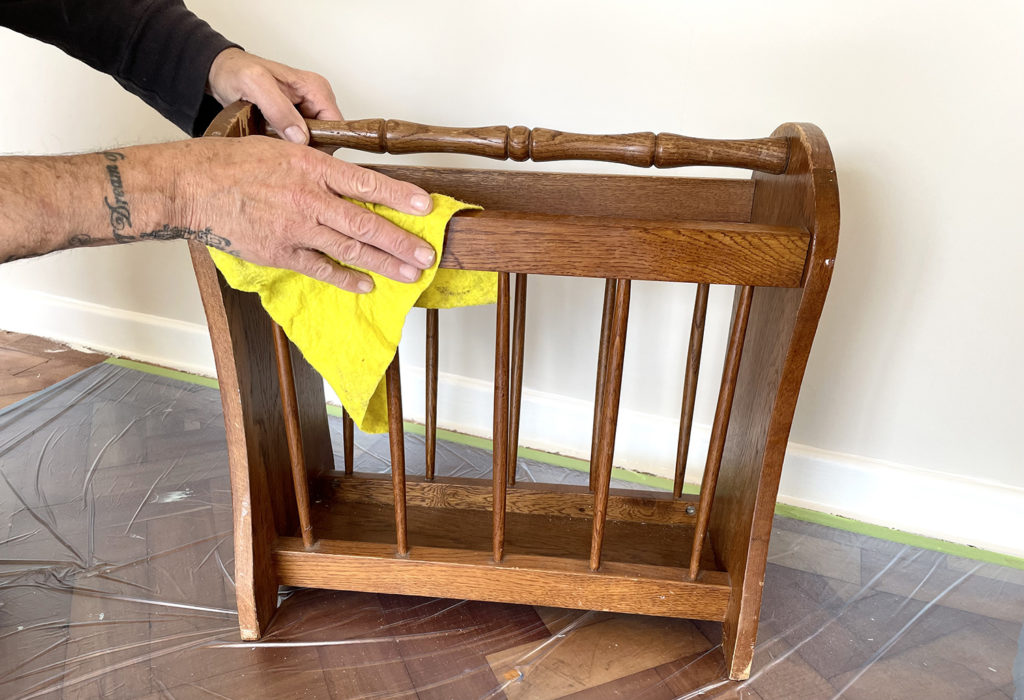
Step 1
The first step in upcycling the magazine rack is to give it a thorough clean by removing all the dust. Then wipe it down with a damp cloth and make sure you clean all the difficult areas and corners.
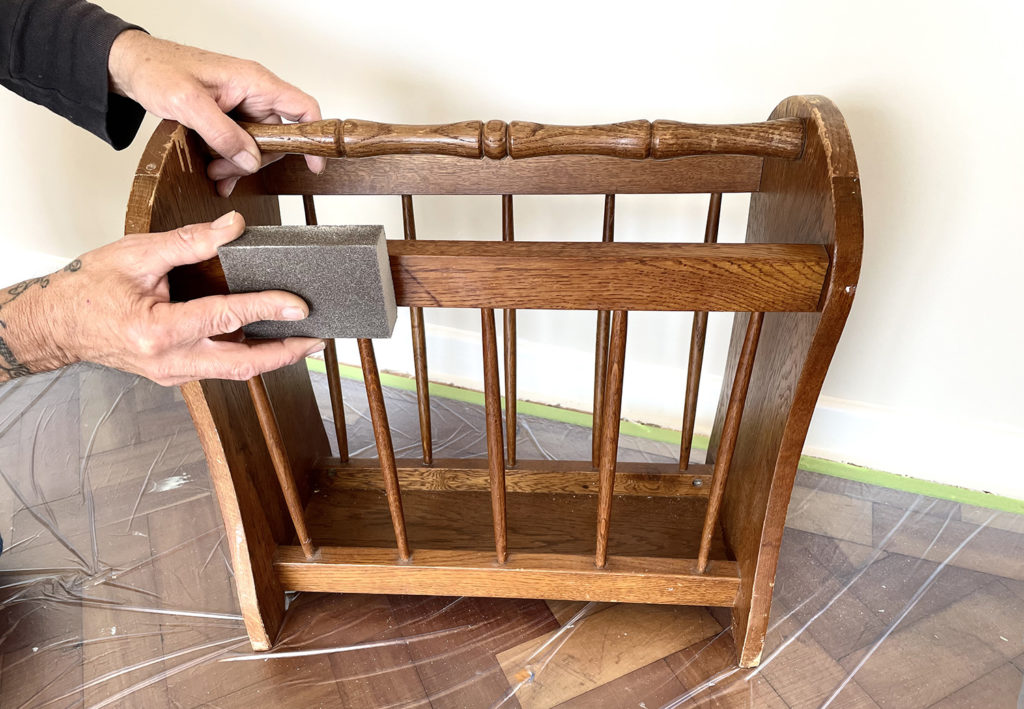
Step 2
Once it has dried thoroughly the next step is to sand down the magazine rack using a grade 80 sandpaper. This will remove any imperfections and polish that may have been used to clean the magazine rack in its original state.
After you’ve finished sanding down the rack, you’ll then need to clean and wipe off any residue dust with a damp cloth. This will make sure that the Rust-Oleum furniture paint adheres properly.
Step 3
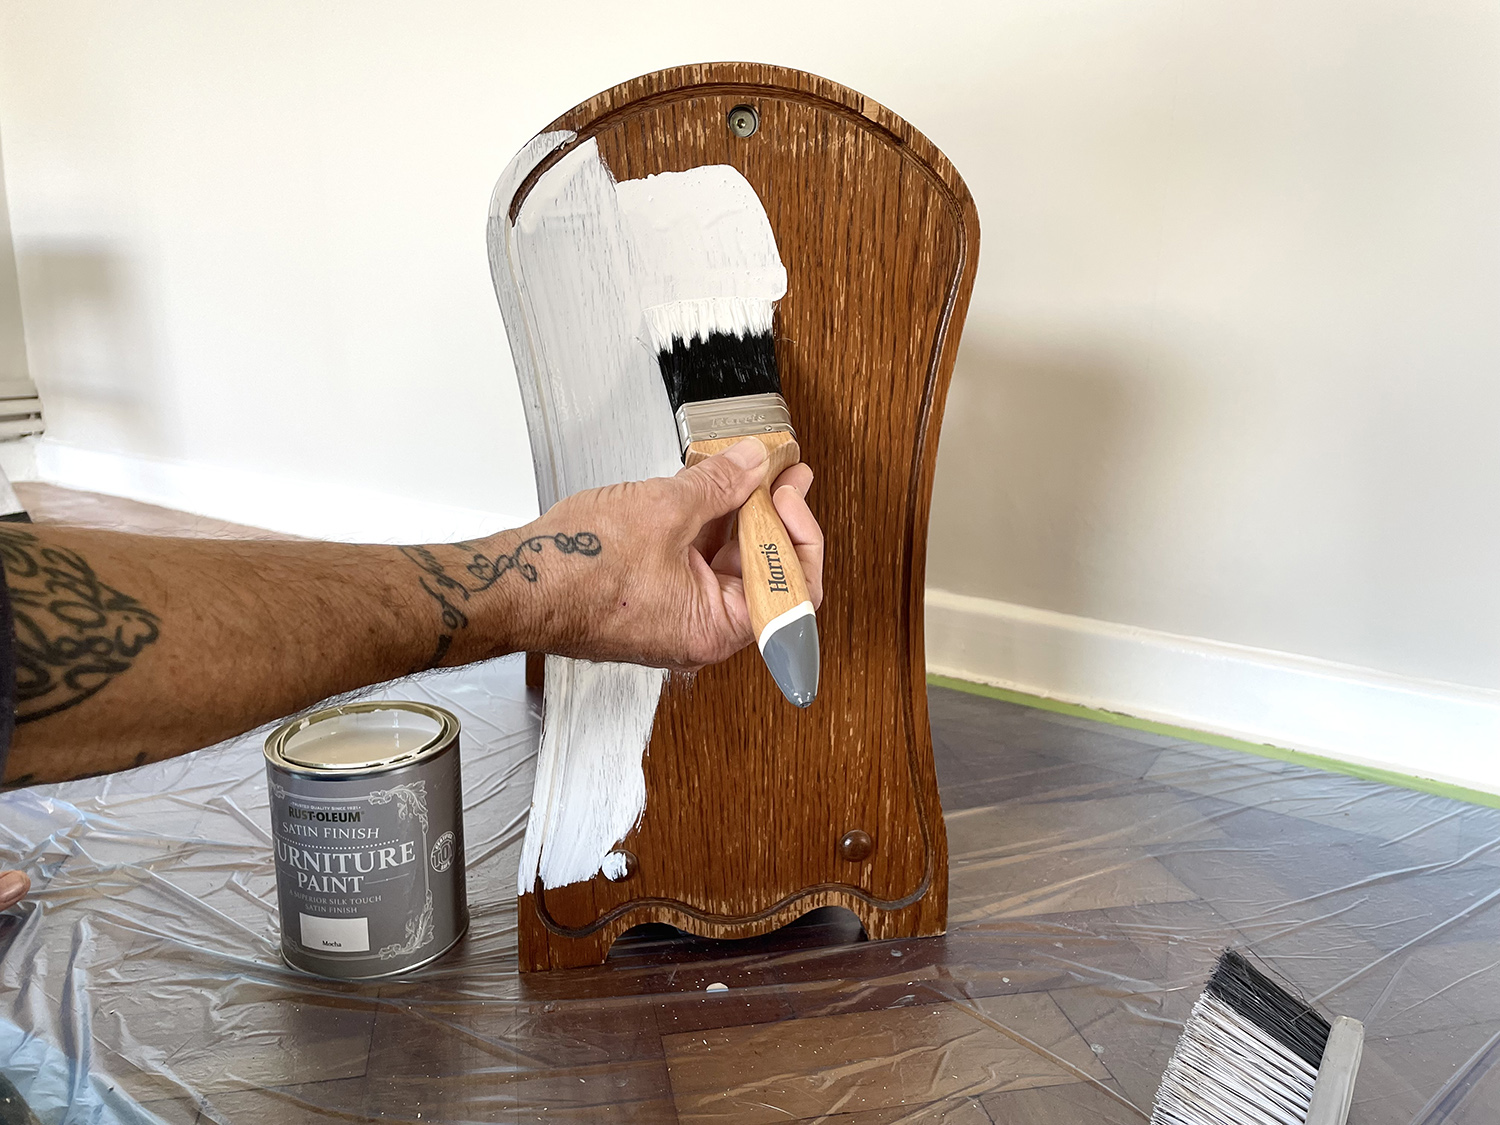
Now you can start the process of giving your magazine rack a new lease of life! Using a 2 inch brush, start applying your chosen colour of Rust-Oleum paint – I picked ‘Mocha’ because it complements the décor in our lounge.
When applying the paint, the trick is not to overload your brush and paint in the direction of the wood grain. Don’t worry if the first coat isn’t completely opaque – you might see some of the underneath peaking through. It’s likely you’ll need at least two coats to get a solid finish.
Make sure you allow the first coat of paint to completely dry before attempting the second – this should take 5 hours.
Our magazine rack has spindles, so take your time when painting these as it’s easy for paint drips to form in the intricate areas. If you do spot a drip after its dry, simply use a fine sandpaper (120 grade) to lightly rub this down and don’t forget to wipe up the dust before you start your next coat of paint.
Step 4
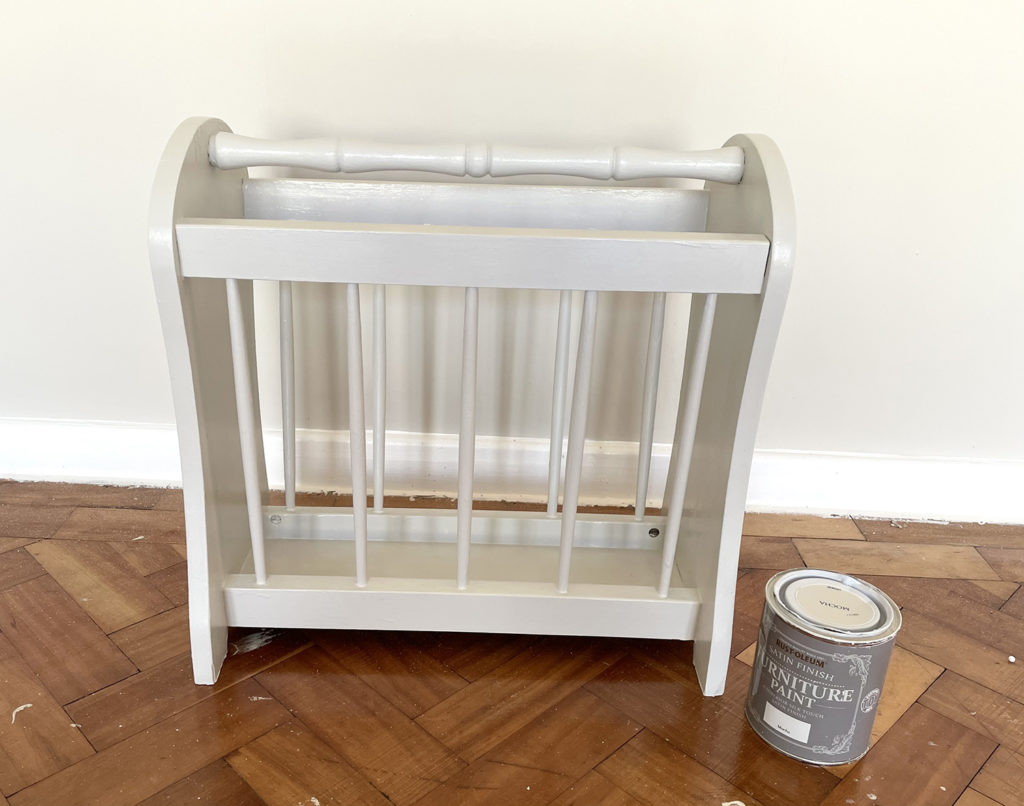
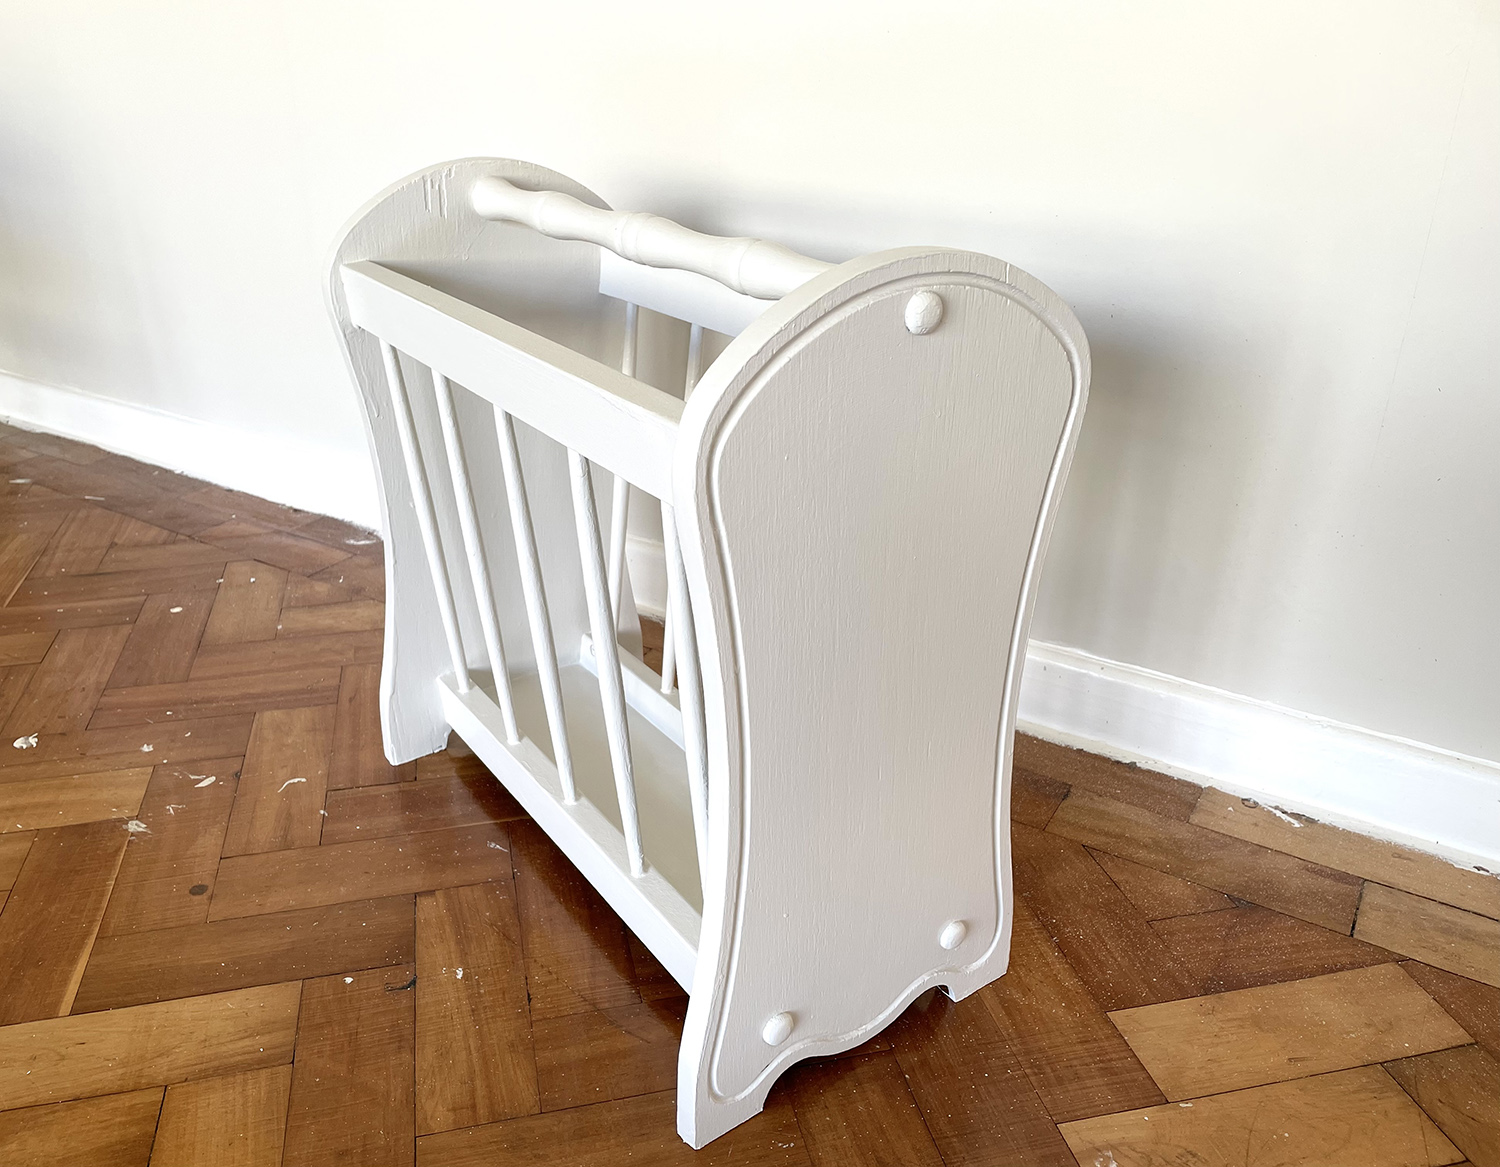
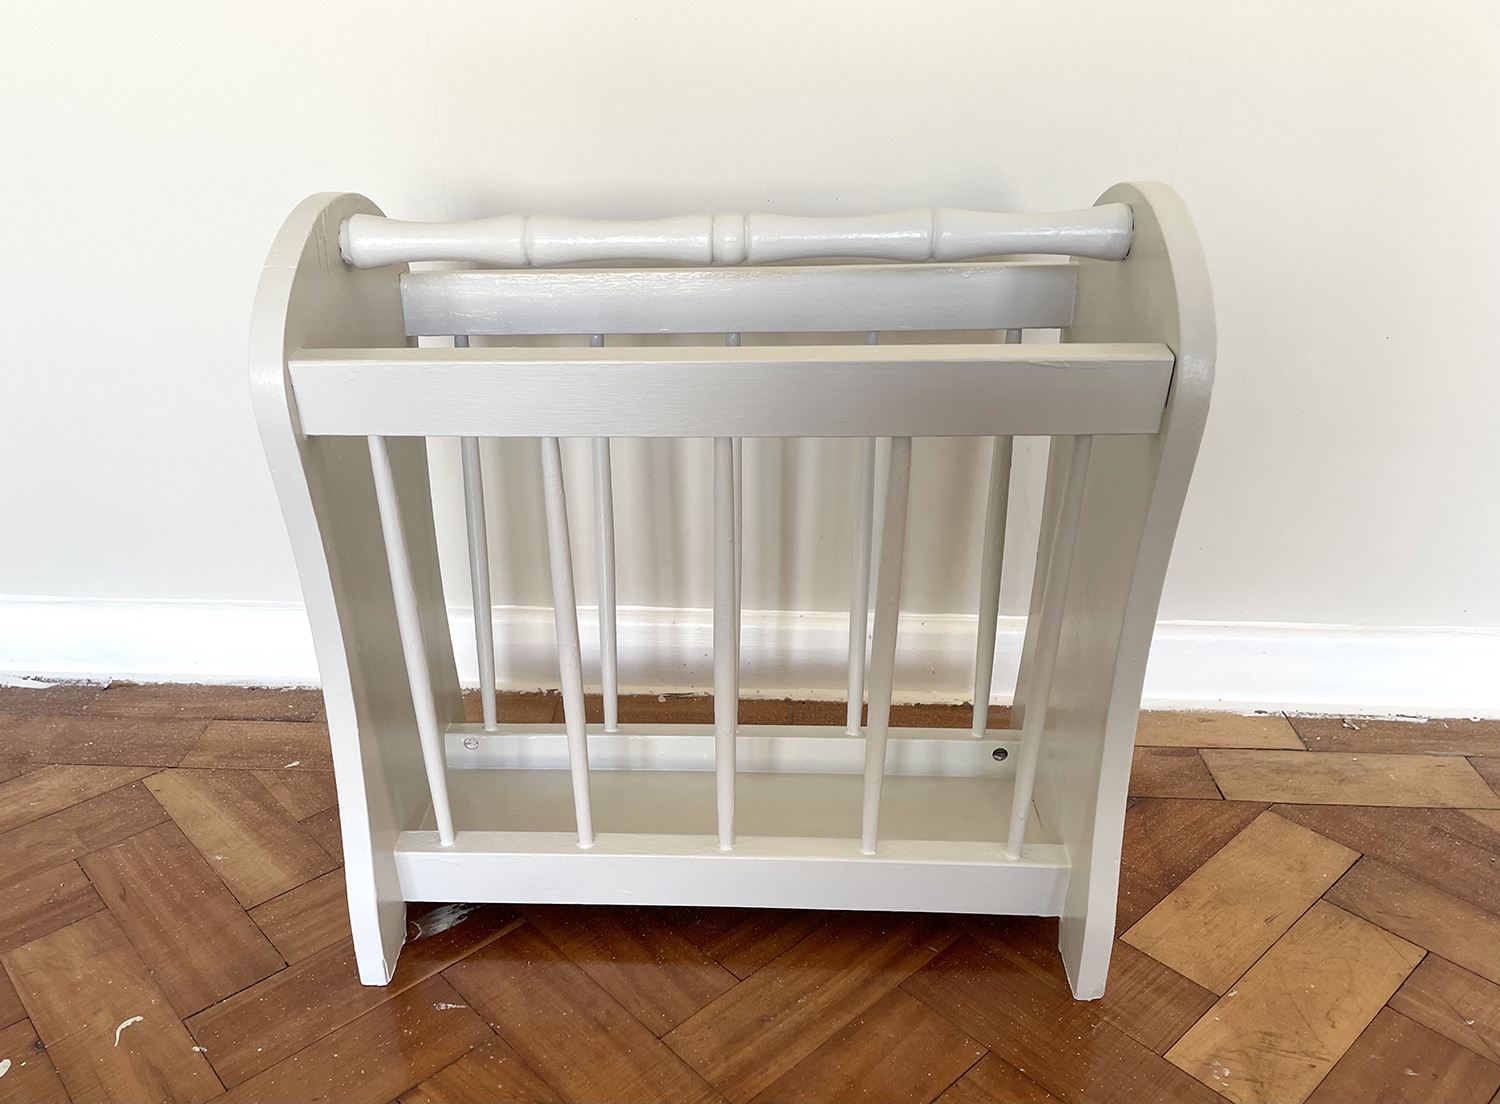
At this stage, you may decide that you’d like to personalise your newly painted magazine rack. You could add stencil pattern, add words or paint a free hand design. I’ve gone for a simpler look and left ours in the solid mocha colour.
If you are looking to achieve the shabby-chic look, you could also lightly rub down the magazine rack. This way you’ll achieve an effect where the underlying wood shows through the painted layers.
Step 5
Finally, to protect your newly painted magazine rack you can wax it using Rust-Oleum furniture wax or you can leave the piece of furniture with the pure painted finish. It’s totally down to personal choice.
So, there you have it! A very simple guide to upcycling an old magazine rack and giving it a completely new lease of life, which can be used for many years to come.


