Nigel Higgins – DIY Daddy
I have been a painter and decorator for over twenty years and there is no doubt I have learnt over that time how to get the perfect finish on many different surfaces.
When I have undertaken a painting and decorating job for a client, the one comment I hear so often is: “I hate painting the woodwork” and in particular the skirting boards. The usual comment I hear is that people struggle to get a very good finish or the paint runs, or they can’t get a straight line between the wall and the top of the skirting board. Well, hopefully through my tutorial I will be able to show you how you can achieve the perfect finish and it’s really very simple as I will show.
Before we start, it’s very important when buying your undercoat and satinwood paint that you always buy the undercoat and satinwood paint in metal packaging. This is the most environmentally friendly and sustainable way to buy. It’s also much better for storage. Metal recycles forever – it can be recycled over and over again with no loss of quality so it really is worth making the effort to seek metal containers.
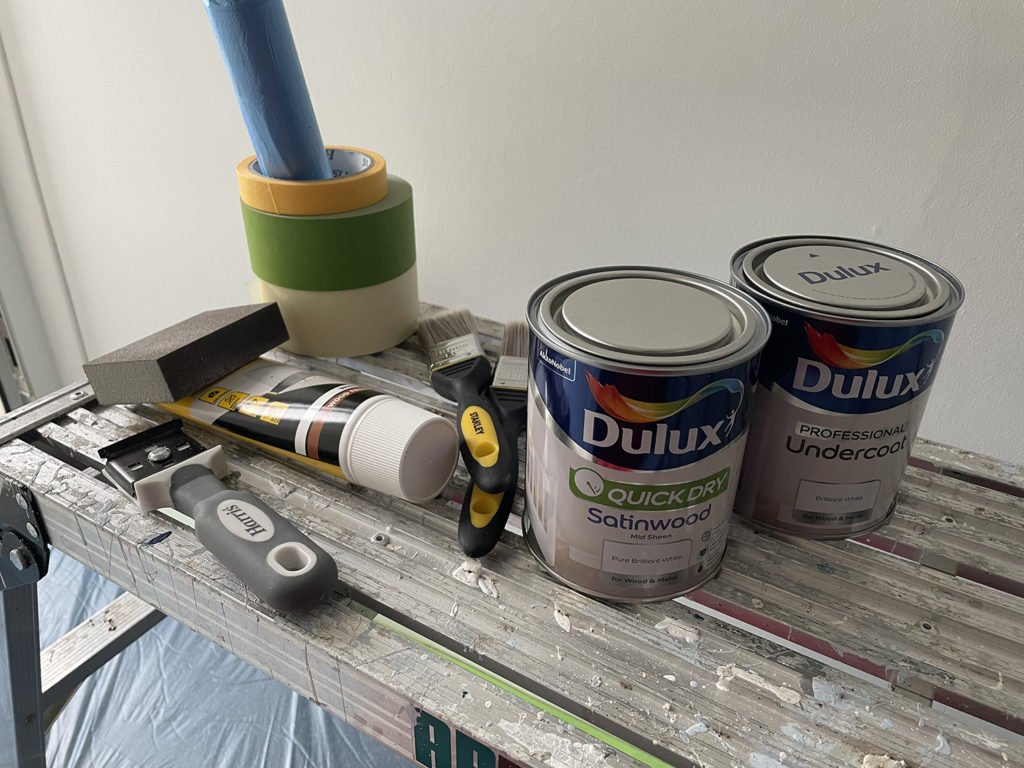
Of course, you will need a number of products and tools to complete the job of painting a skirting board. Here is a list of everything that is required:
- 1 Litre tin of Dulux undercoat paint
- 1 Litre tin of Dulux Satinwood or Gloss paint
- 120 grade sandpaper block
- Filler for any holes in the wood
- Paint brushes – 2 inch and 1 and a half inch. This will depend on the height of your skirting board
- For preparation – small wood scraper
- Dust sheets and masking tape
My first and most important tip for painting a skirting board is quite simple. It is all about preparation and I cannot emphasise how important that is. So, let’s get on with the tutorial.

Step 1
The first thing you need to do is put down dust sheets. This is vital so you don’t ruin your carpets or wood floors. I personally use dust sheets that have masking tape on one side so they don’t move when you are working on your skirting board.
Step 2

Now everything around the area of the skirting board is protected, you can begin to prepare your wood. Firstly, using your small wood scraper, run it along the skirting board to remove any old flaky paint or bubbles of paint. This will give a smoother finish for the sanding.
Step 3
In older homes the chances are the skirting boards were fixed to the wall by screws. This quite often leaves holes that will need filling. In new builds this won’t be a problem because skirting boards are now fixed using the strong adhesives that are available. Of course if the skirting boards are in an older property there could be chips to the wood. It’s important to use a suitable filler to fill any holes before moving onto the next step.
Step 4
The next step is to sand the whole of the skirting board using a 120 grade sandpaper to make sure that it’s as smooth as possible. This takes a little time, but I can assure you it will be worth it when you see the finished skirting board.
Step 5
So now all the preparation is done, you can move on to painting. People always ask me how to get a straight line between the wall and skirting board. It’s simple. Use low tack masking tape to mask a straight line on the joint between the skirting board and the wall. As it’s low tack, it won’t stick too tightly and pull off paint.
Once that is done you can undercoat the skirting board using the Dulux undercoat. Once it’s all painted in undercoat, leave it for 24 hours to dry completely. A tip at this point – don’t apply too much paint as this will cause runs in the paint.
Step 6
Having allowed the undercoat to dry for 24 hours, it’s now time to apply your top coat of either gloss or satinwood finish. I am using Dulux satinwood for the purpose of this tutorial. Apply your Dulux satinwood paint and then allow the paint to dry for a further 24 hours. It may or may not require a further topcoat however, usually one topcoat is all that is required. Then all you have to do is very carefully remove the masking tape. Peel it gently, don’t rip it like a plaster or you may bring some paint with it.
That is how you get the perfect finish on skirting boards. Remember, it’s all in the preparation!
If you attempt this step-by-step guide, we’d love to see your results – just use the hashtag #DoItWithCans on social media.


This is the perfect website for everyone who really wants to understand this topic. You understand so much its almost tough to argue with you (not that I personally would want to…HaHa). You definitely put a brand new spin on a topic that’s been discussed for many years. Great stuff, just great!
Thank you so much Tien for your great comments! We are glad we could provide some more insights.