When we had the gas fireplace taken out of our dining room, I found out they hadn’t continued the beautiful bronze tiles behind it. So, I was left with a very ugly bare piece of plaster. I tried to find matching tiles, but when that search wasn’t successful, I had to think of other solutions… I wanted something that was in keeping with the 70s feel of the room, decorative and easy to make myself with materials that I already had. So, what did I do with this very ugly hole in the wall? I made a decorative wood panel, of course!
I love using whatever I can find in my workshop and if something isn’t suitable to be used again, I like to be able to recycle it. Hence, I am always using paint and wood stain that comes in metal tins. Metal can be recycled forever and is robust enough to keep my paint and stain from drying out for years.
For the wood panel I used:
- 3 mm thick plywood
- Scrap wood
- Rustins Wood Dye
- Wood glue (I used Gorilla wood glue)
- Rag to wipe on the wood stain
- Rubber gloves
Here is the hole that I wanted to fill with a decorative wood panel:

We wanted to fill the ugly space where the gas fire used to go, but a decorative wood panel is also great as a piece of art to hang on your wall.
Step 1
Measure how big your back panel needs to be.
Step 2
Cut a piece of thin plywood (mine is 3 mm) to size.
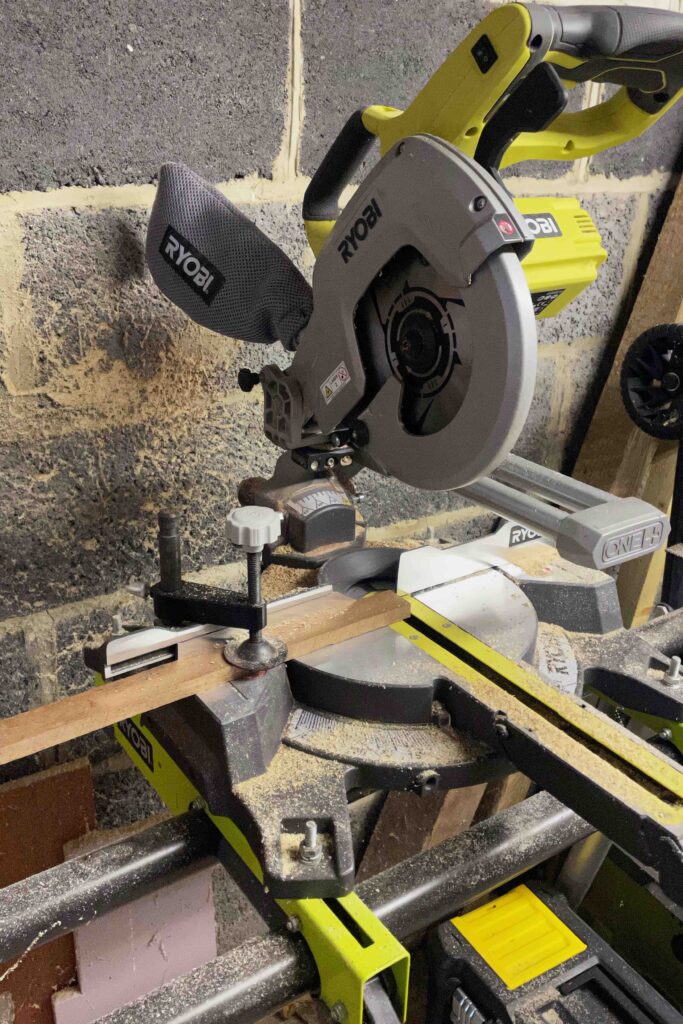
Step 3
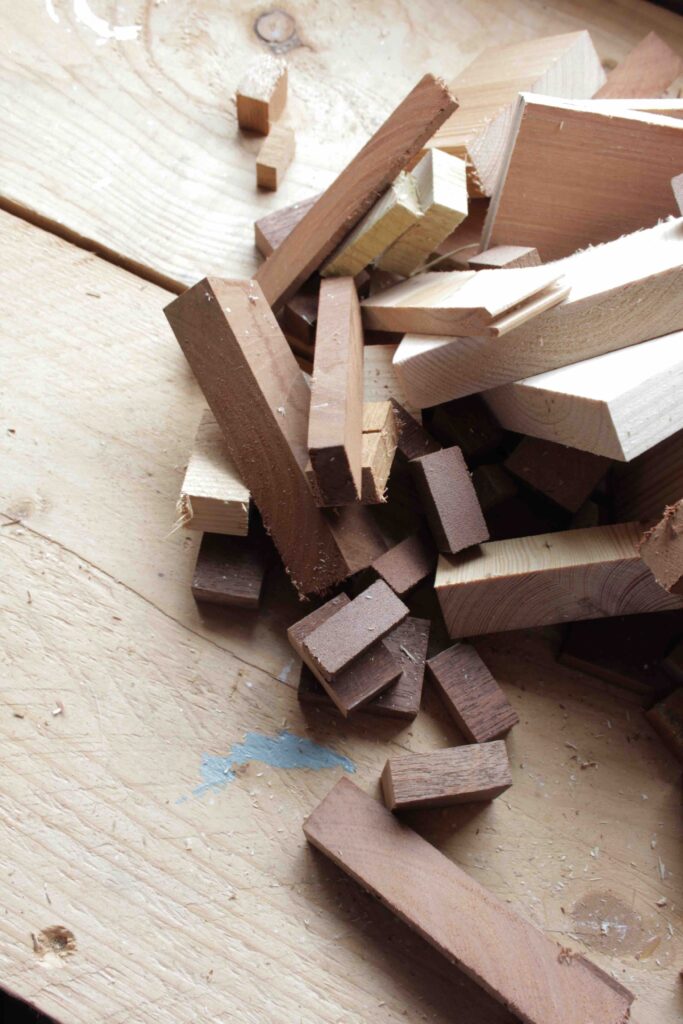
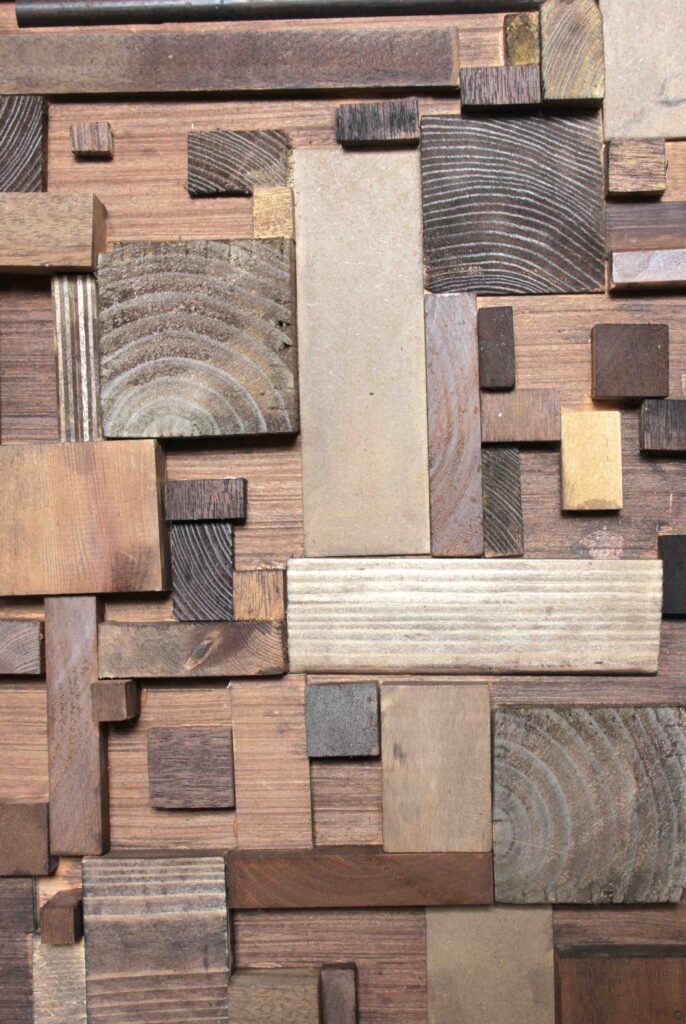
Cut your scrap wood into lots of small pieces. You’re essentially creating a bit of a jigsaw puzzle with these pieces, so it’s nice to have lots of different lengths and thicknesses. My smallest pieces are 2×2 cm and my largest are 5×15 cm.
Step 4
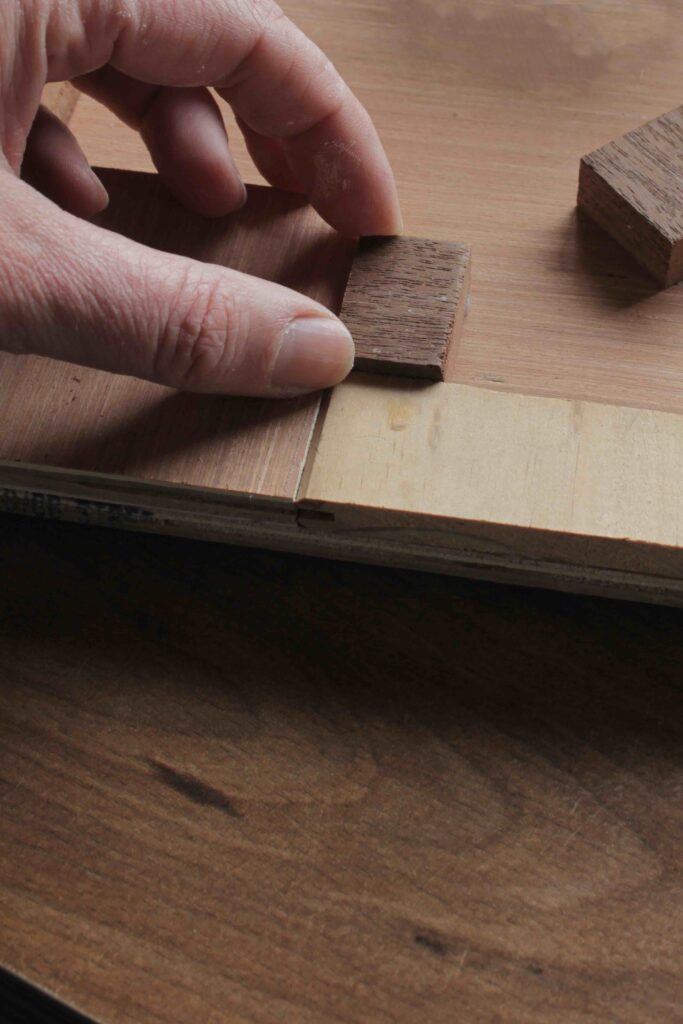
Start gluing your wood pieces to the plywood back panel. Start in one of the corners and work your way around the panel.
Step 5
You can add a small nail to bigger or heavier pieces for extra security.

Step 6
I like to work in small sections. Try out a few pieces of wood in different designs and when you are happy with how it looks, glue them down. Follow the instructions on your wood glue for how long you need to let it dry.

Step 7
Use a wood dye to colour all your pieces of wood a similar colour. I’m using Rustins Wood
Dye in Dark Teak. Apply it with an old rag, but make sure you protect your hands with rubber gloves, so you don’t stain your fingertips brown too!
If you use different types of wood then the colour will vary, but I think that is the charming aspect of this wood panel. I like that you can still see the wood texture and grain.


Step 8
Here is the finished wood panel once I glued and screwed my panel in place.
If you don’t need to fill a piece of wall like me you can use yours as a freestanding piece of art, just lean it against the wall. Or you can screw two D ring hangers to the back top corners so you can hang it on the wall.
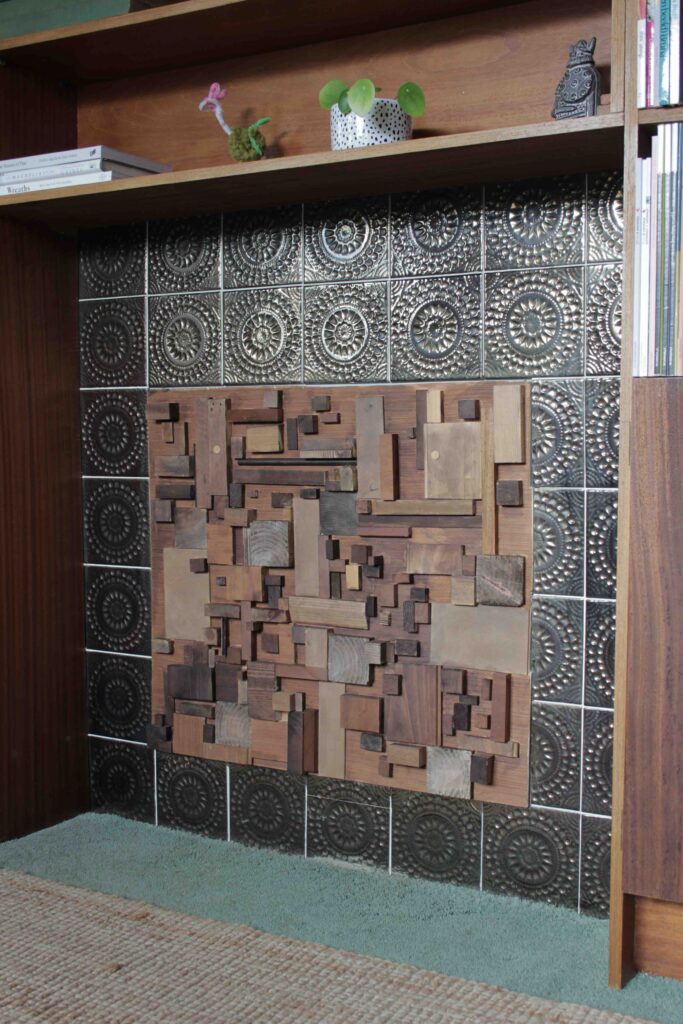
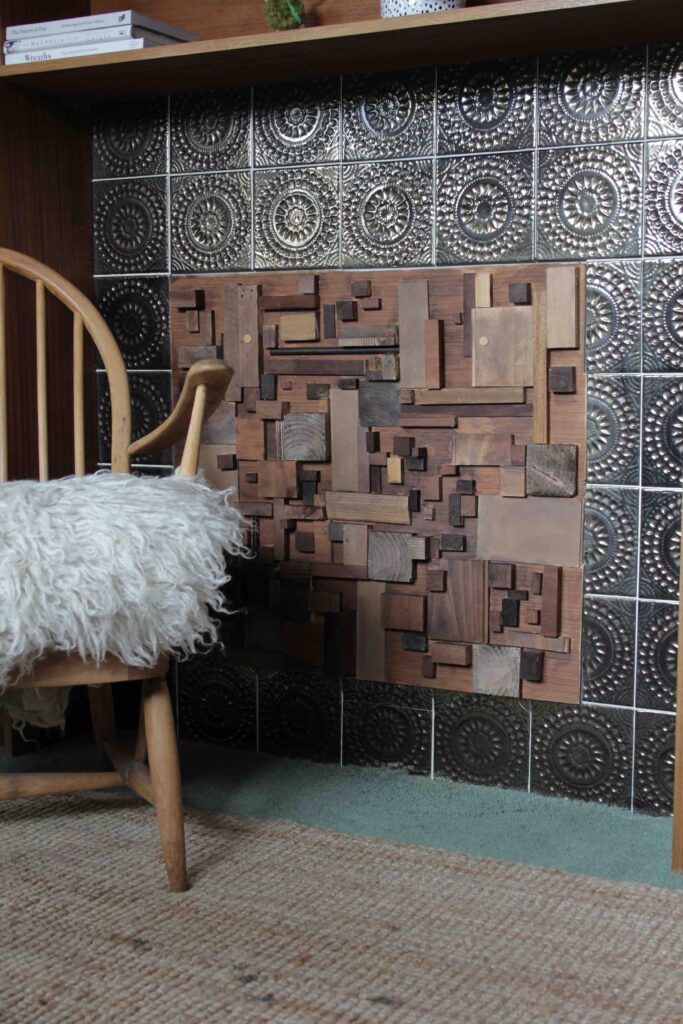
I love that the ugly hole in my wall is now filled with a piece of art!
The dark wood colour of the panel goes great with the built-in cupboards of this 70s inspired room. I’m also rather happy that my massive box of wood offcuts is finally a bit lighter!
I might make a few more decorative wood panels with all the other pieces I have left over… wouldn’t these panels make lovely gifts too? A smaller panel, about A4 size, would look lovely in everyone’s home!
Blog by Hester’s Handmade Home.
Visit her website here – www.hestershandmadehome.com
And her instagram here – www.instagram.com/hestershandmadehome
And check out one of her previous blogs with us like her ‘Photo Collage Art with Coconut & Cotton Glue’


