There is no doubt that over the years, trends and fashions come and go. This is never more noticeable than in home decoration. Back in the 1950/60s, all wood in a home was stained with wood stain. Invariably, the colours chosen for this wood stain were quite dark, such as mahogany, teak or an oak finish. I have lost count of how many times I have been to somebody’s newly purchased home to do some painting and decorating and the first thing they want to do is update the wood stain.
People want to give their home a modern, clean and minimalist look; with modern colours they can breathe new life into the property and bring it into the 21st century.
For houses that were built pre-1960 you will find a lot of quality wood has been used which is quite often a fantastic design. The problem for a lot of people is that, over the years, it has had numerous coats of stain and varnish added. This is very typical in the hall, landing and stairs where you often have beautifully designed staircases with spindles and a sturdy and solid bannister rail.
Many people will simply tear out the entire staircase and start again, but there is no need to do this. You can update the wood-stained staircase by painting it white, using the right paint to cover the wood stain.
There are many paints available and, being a tradesman, I have used many of them over the years, but, in my opinion, the best paint for covering a wood-stained bannister rail and staircase is Rustoleum furniture paint. It requires no primer and usually with just two coats, the wood stain finish has gone forever, leaving behind a modern looking, white bannister rail and staircase. It is also worth noting that in a hall/ landing and stairs, you will have very little light because quite often there are only a couple of windows. So, by painting your bannister rail and staircase in white, it will give the entire area a lift, making it feel brighter.
In this tutorial I am going to show you the steps to take to paint a wood-stained bannister rail and get rid of that old fashioned look. Best of all, it will cost a fraction of renewing your entire staircase!
When buying your Rustoleum furniture Paint, I always choose metal packaging. This is because metal recycles forever and has a high recycling rate. You can, of course, upcycle your can and reuse it in many different and creative ways. But if you don’t have an idea in mind, you can simply clean out the paint residue (using newspapers can help) and add the cans to your normal recycling waste.
Now let’s get on with the step-by-step tutorial.
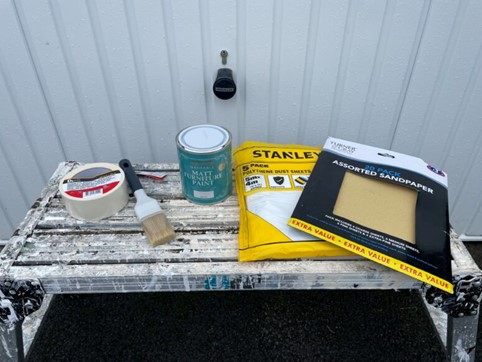
Tool and products required:
1. 750ml tin of white Rustoleum furniture paint
2. 120 grade fine sandpaper
3. Half inch (12.7mm) paintbrush
4. Dust sheets
5. Clean cloth
6. Masking tape
Step 1
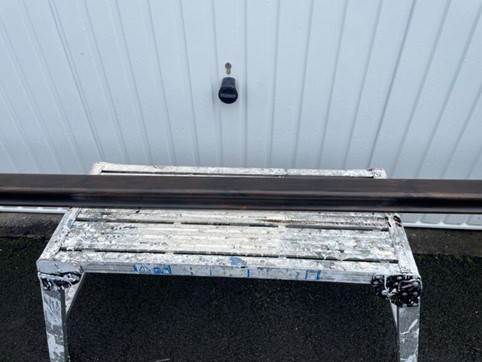
You will most likely be painting the banister rail while it is in place on the stairs so make sure you place dust sheets down on the carpet or flooring and use masking tape. Make sure anything that is close to what you are painting is masked up. I am using a banister rail that is not fitted so I won’t need to protect any flooring.
Step 2
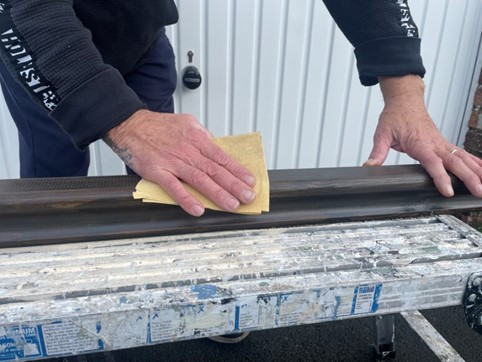
The second thing you need to do is to sand down the bannister rail using a 120 grade sandpaper. This will reduce the amount of wood stain on the bannister rail and give a smooth surface for when you apply the Rustoleum furniture paint.
Tip 1
The more preparation you make by sanding the bannister rail, the better the overall paint finish will be, so take the time to get a very smooth finish on the wood.
Step 3
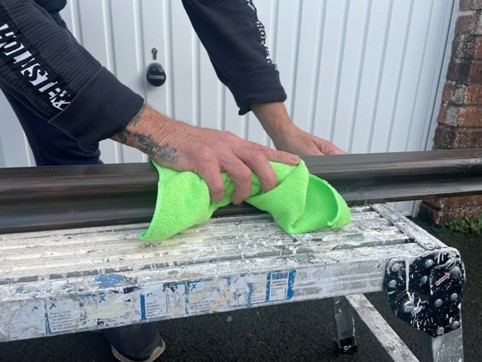
Once you have sanded down the banister rail, wipe it down with a damp, clean cloth. This will remove any dust particles and will ultimately give a perfect paint finish.
Step 4
You will now be ready to paint the bannister rail. Using even strokes paint the bannister rail in Rustoleum furniture paint.
Rustoleum furniture paint is quick drying but allow at least six hours between the first and second coat of paint.
As you can see from the image, the wood stain has completely gone and you have a perfect white, painted, modern looking banister rail that will add character and sophistication to any home.

Tip 2
Don’t overload the paintbrush with paint otherwise you will end up with a very uneven finish on the bannister rail.
As you can see from the images below… just two coats of Rustoleum furniture paint means that the wood stain has completely gone, and you have a modern white looking banister rail.
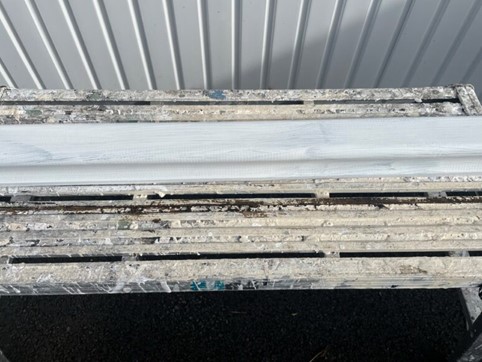
First coat of paint
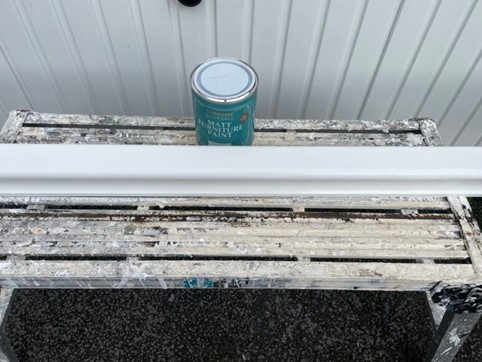
Second coat of paint
I hope you enjoyed my tutorial on how to paint a wood-stained banister rail.
Blog by Nigel Higgins – DIY Daddy


