Summertime is traditionally the time when we get out in the garden and start sorting out all the borders, trees and flowers, so it’s all looking its best. Many gardens nowadays have extra garden buildings such as greenhouses, sheds or even a summerhouse. Summer is the perfect time to make sure that all these garden buildings are in perfect condition and to prepare them for the winter to come.
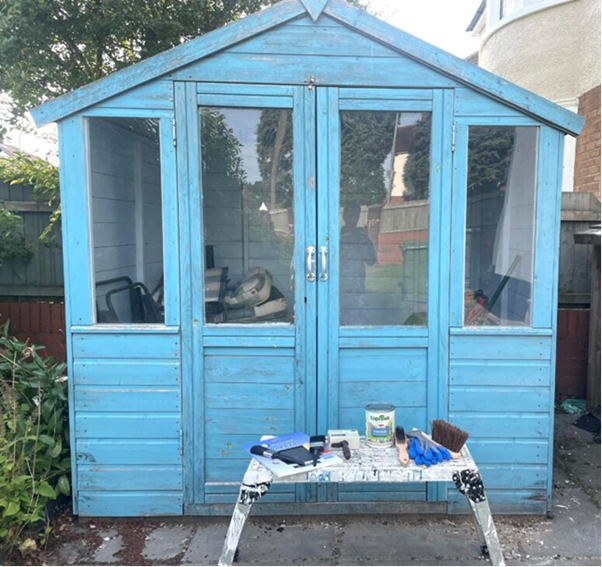
In this tutorial I am going to show you how to renovate a summerhouse that has been neglected for a few years. As you can see, my summerhouse was beginning to look tired and, quite honestly, not very appealing to use during the summer months!
A summerhouse is like an extra room for your house. The only difference being.. it’s in your garden! Also, it can have multiple uses. For example, a quiet place to sit and have a nice cold drink on a hot summer’s day whilst enjoying a conversation with friends or family. You could even use it as a children’s playroom. So, keeping it in tip top condition is an absolute must for years of pleasure.
Before you start..
If you have had a summerhouse in your garden for a few years, it’s very important to check the roof felt. If it’s curling back around the nails and it feels brittle, then I highly recommend you change the felt to make sure you don’t get any water leaks. It’s a very easy job to do and not very expensive. If you do it yourself the cost of materials is around £60.00.
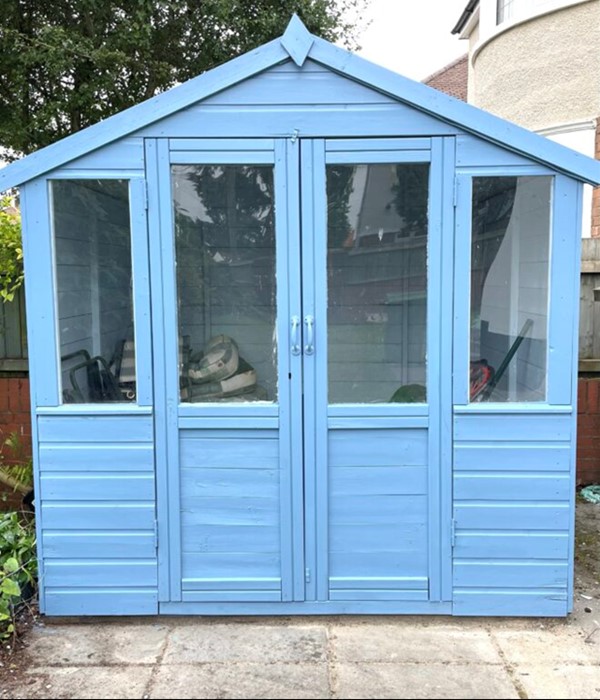
Once you’ve replaced the roof felt, it’s time to prepare and paint the summerhouse in Cuprinol Garden Shades. I have decided to use the colour ‘Forget Me Not’, as it’s a lovely blue colour.
Before the tutorial begins, I think it is worth noting that I buy my Cuprinol Garden Shades wood stain in a metal can. This is because metal has a high recycling rate and you can usually recycle it from your curbside. So, all I need to do is make sure the can is completely empty and pop it in my bin where it can be easily recycled and I know it will go to the processing plant to be turned into another metal object of use.
Cans do also lend themselves to being reused or upcycled in many different and creative ways. But ultimately, whether you reuse or recycle, you will be helping the environment and therefore making the world a better place for future generations. If we all do our little bit, it will collectively have a big impact.
I find metal cans are also great in terms of storage, as they keep the paint fresh and in brilliant condition for a very long period. I can also be assured that there will be no spillages and the cans also stack nicely.
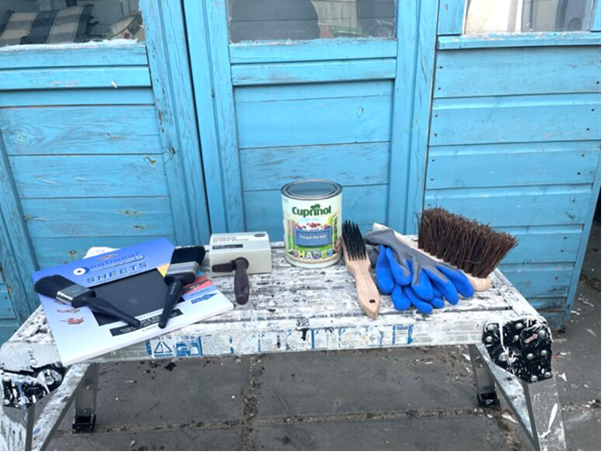
The tools and products you will require to renovate your summerhouse are:
1. Cuprinol Garden Shades (‘Forget Me Not’) – 2.5L size will cover up to 12 m² on average
2. A wood preservative 4-inch block paintbrush
3. A 2-inch paintbrush
4. Sandpaper medium grade – 240 grit (grit is simply the measuring system for sandpaper)
5. A hard bristle hand brush
6. A wire brush
7. Gloves
So now that the roof felt is replaced, we are ready to go ahead with breathing some new life into the exterior wood surface of the summerhouse by using Cuprinol Garden Shades wood stain.
Step 1
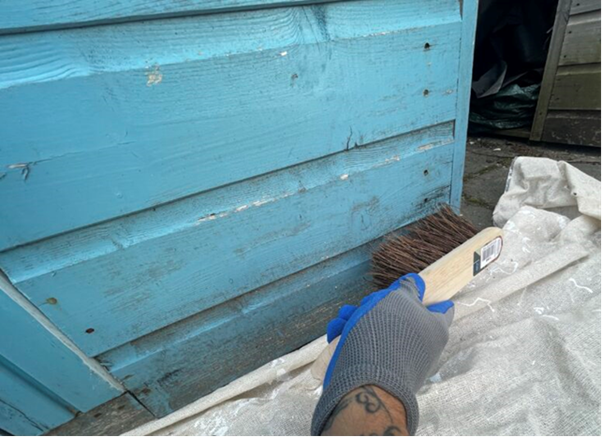
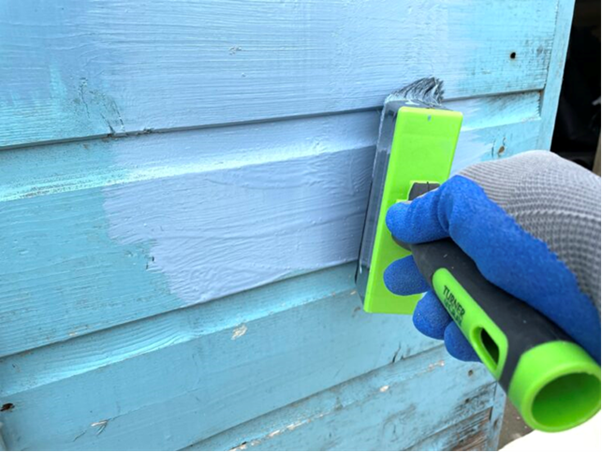
When you are going to apply paint or wood stain to any surface, it is very important to make sure that the surface is clean, and any debris or mould is cleaned off; using a hand-held, hard bristle brush is perfect. You will find a lot of muck around the base so give it a good brush.
Step 2
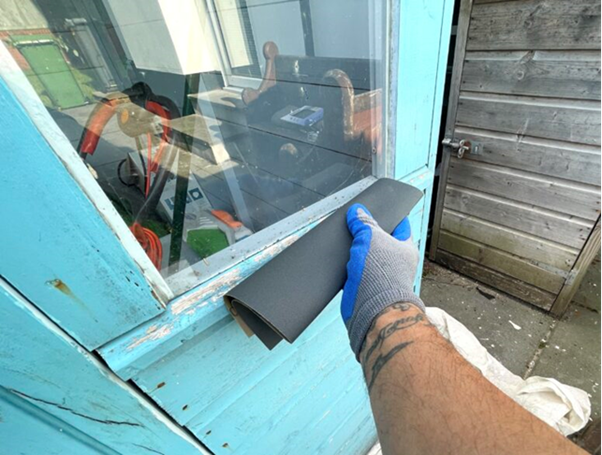
Once you have cleaned off the debris, if there are any rough or broken pieces of timber, use the 240 grade sandpaper to smooth out and repair if necessary. This is to ensure that you have a good surface to paint on.
Step 3
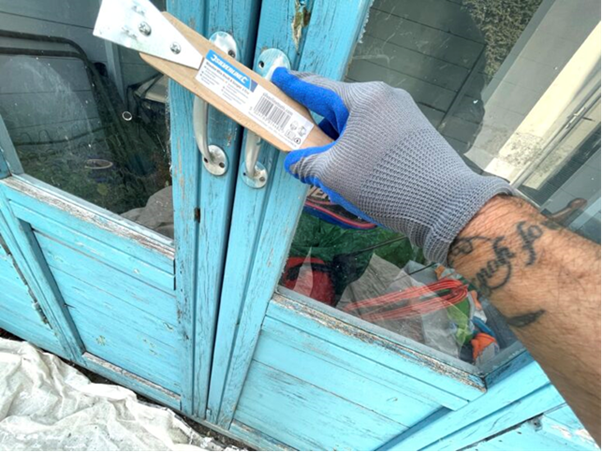
If you have any metal parts on the summerhouse that may have gone rusty, such as handles, then use a wire brush; it is a good way to clean them up and make them look like new again.
Step 4
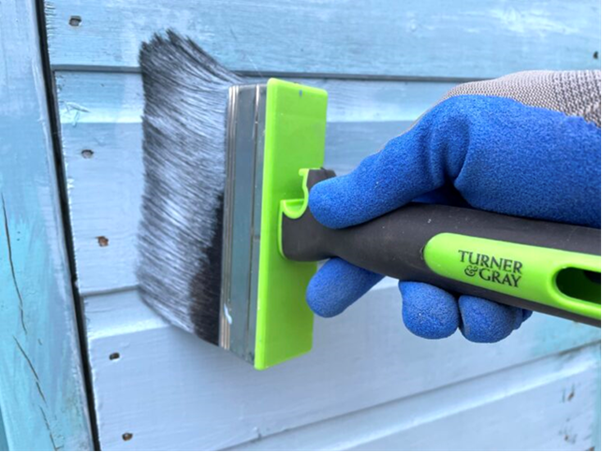
Your summerhouse is now ready to be painted with Cuprinol Garden Shades wood stain. I have a couple of top tips for this part of the renovation.
Tip 1
When applying the wood stain be generous but not too generous otherwise you will create runs and this won’t give you the smooth finish you are after.
Tip 2
It doesn’t matter what colour you are covering – it will need at least two coats to completely cover the previous colour. When covering a previous darker colour, more than two coats may be needed. The biggest reason for applying two coats is that it will bring out the full depth of your new colour.
Tip 3
When applying the wood stain, start at the top of the summerhouse and work your way down gradually. Only do one side at a time. Once you have painted all sides of the summerhouse allow a couple of hours to dry and then apply another coat.
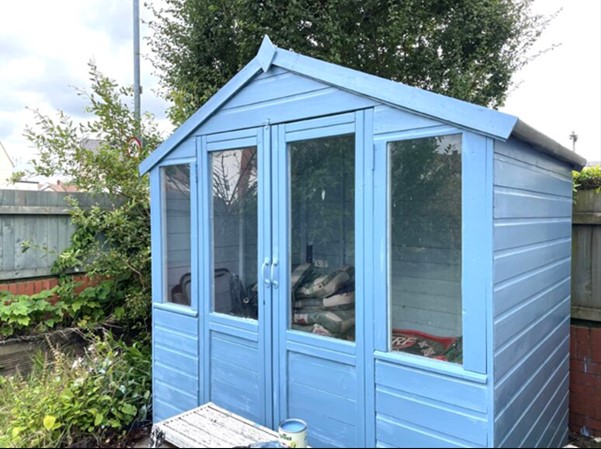
Then the renovation of your summerhouse shall be finished and, as you can see, it looks fantastic in Cuprinol forget-me-not garden shade wood stain!
That’s my tutorial for renovating a summerhouse.
Nigel Higgins – DIY Daddy
Check out our other blogs like.. How to DIY your own decking


