by Victoria Fitz-Gerald of @fixing_up_58
Having completely gutted and transformed our Victorian London terraced home alongside my wood-working extraordinaire husband (“Mr-58”), we consider ourselves highly experienced DIYers. I document our progress and publish step-by-step tutorials on my social media profiles, utilising various #gifted products along the way. I love antique and vintage features, and I have a passion for reusing and recycling wherever possible, whilst making savings along the way and sharing those ideas.
I must admit, there are jobs we must do to our homes that we probably all keep on putting off, but if you’re anything like me the feeling of satisfaction once it’s completed certainly makes it worth it!
Wooden window frames and windowsills are certainly beautiful, but they do require some maintenance. It’s not just about the aesthetic either, it’s also about protecting the wood. It doesn’t need to be a complicated job, but a bit of steer will certainly help, which is what you’ll find here.
You will need
- 40, 80 and 120 grade sandpaper
- Paint scraper or chisel
- Dulux Weathershield Quick Dry Exterior Satin , in Brilliant White
- Dust sheets
- Cleaning cloth / biodegradable baby wipes
STEP 1: Protect your workspace
I would suggest a dust sheet for this job, as you’ll be stripping back some paint, as well as using wet paint and brushes.
STEP 2: Prepare your (window) sill
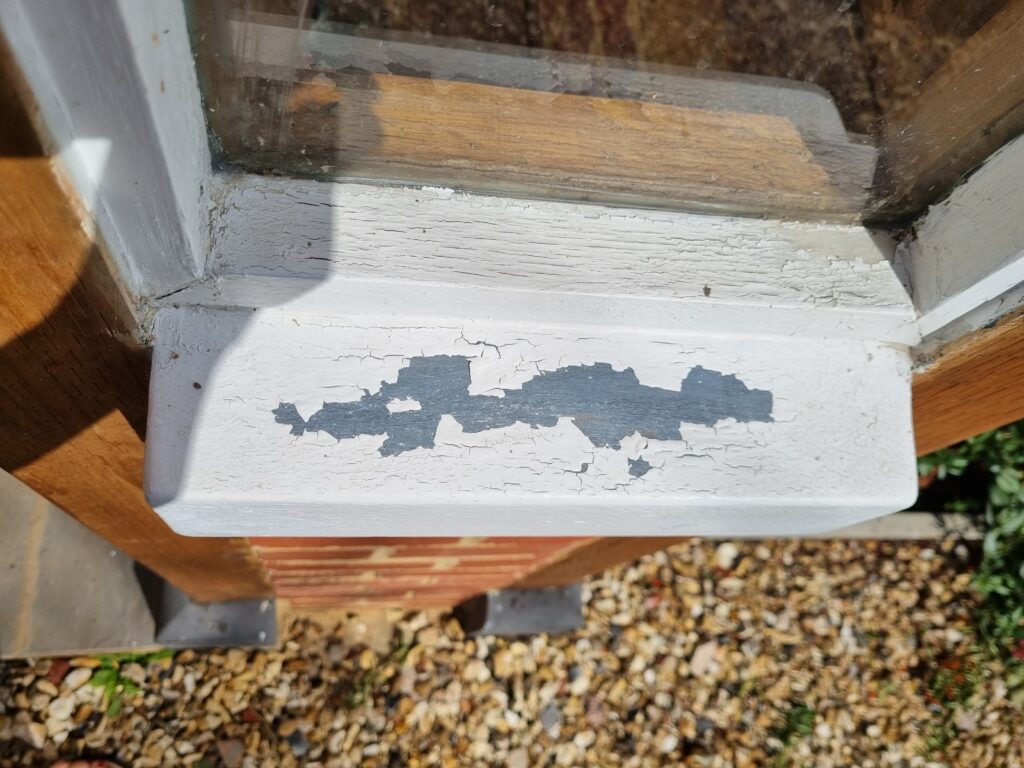
This blog is a guide for painting a wooden frame and sill, but this paint is also suitable for exterior metal and the same steps are applicable to most materials. You’ll see from the image that there’s a significant amount of peeling and cracking to the existing paintwork, so before going anywhere near it with a paint brush, take a chisel (or you can use a scraper) to the paint and give it a really thorough strip, removing as much flaky paint as possible.

Using sandpaper (starting with 40 grit very coarse paper) sand thoroughly, softening all the edges of the paint, before reducing the coarseness of the paper, to 80 grit and then 120 grit to smooth it all over and ensure no lumps and bumps.
Don’t panic. The windowsill will look worse after this step, not better. But you do need to be thorough to ensure it really preps the surface.
You need to sand the entire area, not just the flaky bits, in order to remove any sheen from the existing paint. I recommend sanding down the whole window frame in order to ensure a consistent finish from the gloss paint.
STEP 3: Clean the area
se a damp cloth to thoroughly wipe down the area that is due to be painted. Since this is an outdoor window, it was also a good moment for us to clear any spiders’ webs, bugs and dirt as well as the dust created by the sanding.
STEP 4: Tape, if you like! (I don’t)
So, here’s a little secret… I’m not a masking tape girl! I find the tediousness of the prep doesn’t pay off for the results, and over the years have preferred spending the time and attention getting a straight line instead.
But everyone is different so if you’re a taper – do it now!
If you’re unsure I would say a window is a great one to experiment with not taping, as paint wipes off glass easily when wet, and scrapes off for a clean finish.
STEP 5: Prime
If you’re painting any bare wood or metal then you’ll need to prime the area before painting with your wood and metal paint, before leaving it to dry for the indicated time. This would be an undercoat to use on bare wood.
STEP 6: Now for a satin finish!
Once all the preparation is complete and the windowsill is dry, you’re ready to paint. Make sure the tin is well mixed, using a stirrer. You’ll need to do at least two coats, and ensure the first coat is fully dry before adding the second.

Unfortunately, on the day I painted the sills it was extremely hot and sunny, which resulted in the first coat cracking, almost immediately. Ideally, you’d avoid painting on a day like this, but if you have no choice and get the same result, go back with the scraper and sandpaper to get a nice even finish before doing any further coats. I then proceeded with very thin coats in order to ensure no further cracking.
The image above shows the cracked result from the sun light and heat.

STEP 7: Clean up the edges
Once all the painting is completed and dry you can start to do the post-paint-damage-control.
As mentioned before, if you’re like me and you’ve not used masking tape you may need to clean up any paint mess on the glass. I tend to use a biodegradable baby wipe pulled very tight over a thumb nail for accuracy. A scraper will also work, just be sure you don’t scratch the glass.
STEP 8: Relax for another 10 years!

This paint guarantees 10 years’ worth of protection so you can relax knowing your wood is sealed and protected from all the elements! Doesn’t it look smart?
Check out other blogs from Victoria like How to DIY your own decking or How to bring a neglected Victorian Fireplace back to life.


