Intro
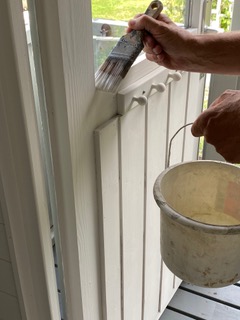
For my Shepherds Hut painting project, it is fair to say I didn’t pick up a paint brush myself; this time I let the experts work their magic. Did you notice Belle’s curved ceiling? My shoulders and lower back are not quite what they once were. I did work my magic however with a sponge and bucket of soapy water, ensuring greasy finger marks became a thing of the past.
Although I may not have personally painted Belle, I am no stranger to applying Lick paint elsewhere in my DIY projects and I have become quite the fan. I find it lives up to its easy-to-apply hype providing a solid and even coverage and it doesn’t seem to require endless coats either. And something which is becoming increasingly important to me with all my painting projects, Lick paint is a water-based solution and thus contains no harmful chemicals. Also, its metal pack fulfils the brands sustainability goals as metal paint cans are easily recycled when empty and metal can be recycled infinitely.
Painting the Walls, Ceiling and Doors
I was pleased to read on its website, Lick suggests you can save time and money by skipping the primer – our paint is designed to ensure you just need a few coats with no need for a primer on most surfaces. Safe in this knowledge, one coat of Lick Grey 02 Matt finish was applied to every internal surface at the Shepherds Hut, excluding the floor and the recommended drying time was allowed for.

Painting the Floor
Whilst the first coat of Lick paint was left to dry, the first coat of the floor paint was applied, again on top of the existing white emulsion paint base. Rust-Oleum Chalky Finish Floor Paint is again, a water-based product. Low odour, quick drying times and with its classic low sheen chalk finish, it offers the authentic aged feel I was looking for. The shade I chose is, in my opinion, the perfect backdrop for my vintage and aged rugs as well as my rustic furniture. Although with so many colours to choose from, you could be deciding for some time. I saw some eye rolling from the decorators when I suggested they not fuss too much over a pine knot or chippy edge they might discover on a floorboard. I like to preserve that old knocked look and if I didn’t know better, I would say they find me quite odd. Strange since I should have thought with this approach, I might prove to be their ideal customer.

A second coat of Lick paint, followed by the same of Rust-Oleum floor paint and Belle was soon finished. Although I could not wait to rush over for a few hours faffing with my treasures in their freshly painted home, I did indeed wait a while before I trod the floor boards. You can go ahead and protect the floor still further at this stage with a specialist wood floor varnish or sealer if you like. Particularly if the area is subject to a lot of high traffic, say perhaps a staircase. For the look I hope to achieve, I feel comfortable with two coats of paint alone.
The Finished Project
Clearly it is too early on in this project to pass judgement regarding either products’ durability or longevity, as one often likes to know when one reads such an article as this. However, as I mentioned earlier, I am a repeat customer of both these brands. Therefore, I am happy to report there is a fair amount of both product left over to use on a few smaller DIY projects I have in mind and since both Lick and Rust-Oleum supply these products in durable tins, there is no rush for me to use up the leftovers at speed.
Now, doesn’t Belle look super? She is as fresh as a garden daisy – if only the initial strong odour of fresh paint smelt the same! It is a tricky process to capture the suggested undertones of a colour present in a pale paint on camera unless you are in the paint industry of course. I assure you though, this is no boring grey. When the sun is shining and doors are flung wide open, there is a noticeable lilac glow to Belle’s walls not present before. And what of the flawless floorboards? I think it might take a while before the wear and tear of time is visible. In fact, I would say this chalky finish is a triumphant backdrop for my beautiful weathered and worn rugs, wouldn’t you agree?


Helen Moore of Whitewood and Linen
Check out Helen’s Blog on How to paint a wall with Lick paint here.


